Friday, April 29, 2011

Prajitura Snickers (Snickers Cake)

Share


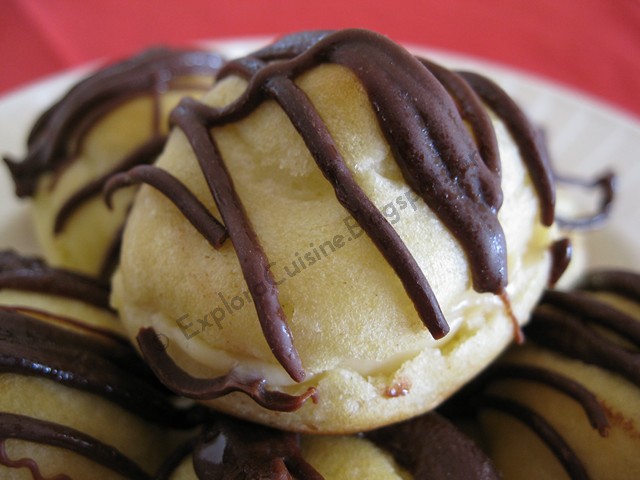
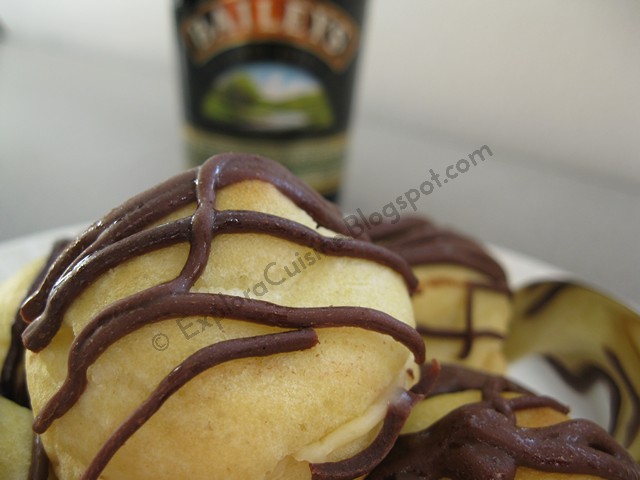
           Anul acesta de Paste, ca desert am facut  pe langa Choux à la crème Baileys si prajitura Snickers, singura prajitura pe care o fac la fiecare sarbatoare negresit caci e preferata sotului meu :) Cand il intreb de ce o vrea de fiecare data, imi spune ca e combinatia perfecta de blat cu crema caramel cu alune prajite din belsug, iar straturile de ciocolata o fac sa fie un desert ciocolatos super ultra mega gustos, foarte similara la gust cu ciocolata Snickers, de unde i se trage si numele :) Pana si mie imi place, eu care cum v-am mai spus, nu sunt fan ciocolata in prajituri, dar recunosc ca pentru mine crema de caramel face totul! Doar sa o incercati o data si va zic ca va deveni si preferata voastra :)
          Am auzit si vazut multe variante de prajitura Snickers, dar eu doar pe aceasta o fac de fiecare data, e perfecta! Imediat ce papilele gustative explora aroma dementiala, va zic ca uitati de toate de pe lumea aceasta  :))
Reteta o am de la mama unui amic de al nostru, este simplu de facut, doar sa respectati toti pasii...
          This year on Easter, for dessert I've made besides Choux à la crème Baileys, Snickers cake, the only cake that I make for all holidays, since it's my husband's favourite :) When I ask him why he wants it every time, he tells me that it has the perfect combination between lots of caramel with toasted peanuts and chocolate layers that makes this cake a delicious chocolate desert, very similar with Snickers chocolate, by which it was named :) Even I like it, I told you I'm not a fan of chocolate in desserts, but I have to admit that for me caramel does all the job here! Just wait until you try it once, and I'm telling you, it's going to be one of your favorites as well :)
          I've heard and seen many versions for Snickers cake, but I always make this one, it's just perfect! When you take a bite, your taste buds start to explore the amazing flavour and they make you forget about this world :)) I've got the recipe from the mother of one of our friends, it's very easy to make, you just have to follow the steps...

Ingrediente/Ingredients:

 Pt blat/For the cake:
  7 albusuri/7 egg whites
  7 linguri zahar/7 tablespoons sugar
  200 g nuca macinata/200 g ground walnuts
  4 linguri faina/4 tablespoons flour
  1 lingurita praf de copt/1 teaspoon baking powder

 Pt glazura 1/For glaze no1: 
  200 g ciocolata alba/200 g white chocolate
  2 linguri ulei/2 tablespoons with oil

Pt crema/For the caramel cream:
  10 linguri zahar/10 tablespoons sugar
  200 g unt/200 g butter
  7 galbenusuri/7 egg yolks
  200 g alune prajite (eu am pus arahide)/200 g hazelnuts (I've used peanuts)

Pt glazura 2/For glaze no 2:
  200 g ciocolata cu lapte (sau neagra)/200 g milk chocolate (or dark)
  2 linguri ulei/2 tablespoons with oil

Cum se face/How it's made:

Pt blat:  preincalzim cuptorul la 180 grade si tapetam o tava cu hartie de copt.
Separam albusurile de galbenusuri si batem albusurile spuma. Adaugam zaharul treptat si batem pana se topeste. Adaugam nuca macinata amestecata cu faina si cu praful de copt, si incorporam cu o lingura usor, fara a apasa compozitia.
We preheat the oven at 360 degrees and we prepare a baking pan with parchment paper.
We beat the egg whites with a mixer and we add the sugar one tablespoon at a time, until it's well mixed.
We add the ground walnuts mixed with flour and baking powder, folding it gently with a spoon into the batter.


Intindem bezeaua in tava tapetata si introducem in cuptor pentru aproximativ 20-25 minute (depinde de cuptor).
We place the batter in the baking pan and we place the pan in the preheated oven for 20-25 minutes.


Cand blatul este usor rumenit, scoateti tava din cuptor si lasati-l sa se raceasca pe un gratar.
When the dough is golden brown we remove it from the oven and leave it to cool on a rack.


Pt glazura 1:
Intr-un vas pe aburi topim 200 g ciocolata alba cu 2 linguri ulei, amestecam bine si turnam peste blatul racit si o intindem frumos.
For glaze 1:
We melt the white chocolate by steam bath and we pour the chocolate on the cooled dough and we level it nicely. 


Dam la rece pana se intareste ciocolata total. (Eu o pun de obicei in congelator, sa se intareasca mai repede, daca nu respectati pasul acesta riscati ca ciocolata alba sa se amestece cu crema).
Intre timp ne ocupam de crema:
Intr-o craticioara caramelizam cele 10 linguri de zahar la foc mic.
We place the cake in the fridge (or freezer) until the chocolate is hard. 9i usually put it in the freezer, so it gets hard quickly).
For the caramel cream:
We place 10 tablespoons of sugar in a pot on low heat, until it's completely melted and caramelised.


 Cand zaharul e topit complet, adaugam untul, amestecam si lasam sa fiarba la foc mic, pana cand untul se amesteca cu zaharul topit.
We add the butter, we mix and we let it boil until it's all mixed very well.


Amestecam galbenusurile cu cele 2 linguri de zahar si le adaugam la crema de caramel impreuna cu alunele prajite.
We mix the egg yolks with the 2 tablespoons with sugar and we add them to the caramel with the peanuts.


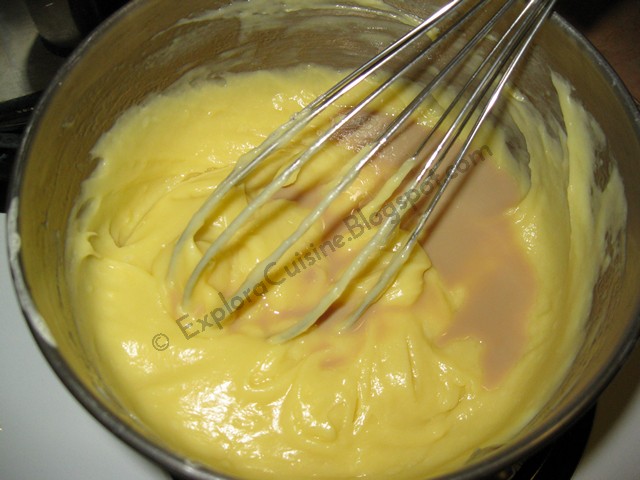
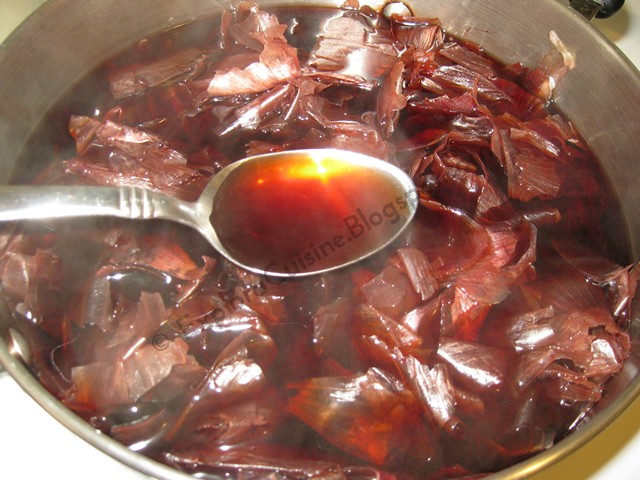
Amestecam continuu si lasam sa fiarba pana cand crema incepe sa se ingroase. Ar trebui sa arate cam asa:
We stir continuously until the cream starts to thicken. It should look like this:


Dam la frigider pana cand crema e complet racita (eu o pun in congelator)
Cand e complet rece intindem crema peste blat. (daca crema nu e rece, va topi glazura alba)
We place the cream in the fridge (or freezer) and when it's completely cold, we place it on the cake. 


Dam la rece din nou prajitura, pentru ca crema sa se intareasca.
Pt glazura 2: topim ciocolata neagra cu 2 linguri de ulei pe aburi si o intindem peste crema de caramel.
We level it nicely and we place it back in the fridge, so it gets really thick. 
For glaze no 2: we melt the dark chocolate and we pour it on the cake (when the cake is really cold), leveling it nicely. 


Dam la rece pentru cel putin 4 ore. Servim cu multa multa pofta!!!
We place the cake back in the fridge for at least 4 hours. We serve with lots of appetite!


Alunele se pot inlocui cu migdale, nuca prajita sau fistic dupa gust. Va recomand sa cumparati ciocolata de calitate.
You can replace the peanuts with almonds, walnuts or pistachio if you prefer :) I recommend using quality chocolate.


Va zic ca nu va puteti opri din mancat :))
You just can't stop eating :))


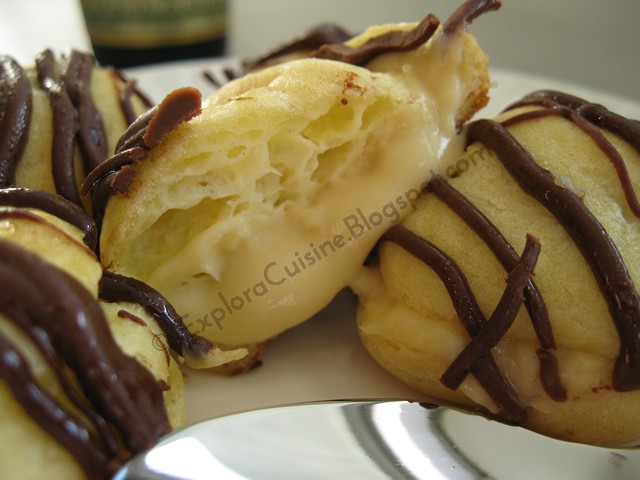
Mai de aproape, yummylicious!!! Mi-e o pofta cand vad pozele din nou :)
Closer, yummy!!! I'm drooling when I see these pictures :)


Tuesday, April 26, 2011

Choux à la crème Baileys (Profiteroles with Baileys Cream)

Share

Please scroll down for English version


            Pentru sarbatoarea de Paste de anul acesta am preparat doar 2 prajituri (am fost doar eu si sotul meu anul acesta): Prajitura Snickers si Choux à la crème.  Am tot evitat sa fac choux-uri caci mi se pareau migaloase, iar eu sunt genul care prefera sa faca un tort decat prajiturele mici :)) pentru ca sotul meu m-a tot batut la cap sa fac ceva cu multa crema, am zis ca e momentul potrivit pentru a le incerca, si bine am facut, caci au fost delicioase!!! Sa detaliem putin ce reprezinta aceste prajiturele...
            Choux à la crème, sau forma mini rotunda a eclerelor, reprezinta un desert frantuzesc ce are la baza tipul de aluat fiert sau pâte à choux, din care se formeaza bile mici ce se dau la cuptor, umplute ulterior cu crema de diferite tipuri, frisca sau inghetata si glazurate cu sos de ciocolata sau diferite toppinguri. Ele pot fi folosite si pe baza de aperitiv, fiind umplute cu creme sarate, de branza, sau peste, etc...
           Pentru ca eu nu ma omor dupa crema patisera care se utilizeaza de obicei, am adaugat in crema Baileys Irish Cream, un lichior foarte aromat care ne place mult, iar choux-urile le-am glazurat cu dungi de ciocolata topita. A iesit o nebunie!!! niste gogosele frumoase cu multa crema ce ti se topesc in gura, iar aroma de Baileys este superba!
Fiind prima data ca le fac, m-am inspirat dupa reteta ce am vazut-o la Andreea de la Dimineti Insorite, pe care am modificat-o dupa gustul meu. Multumesc Andreea pentru inspiratie!

Ingrediente:

 Pt aluat:
   250 ml apa
   100 g unt
   150 g faina
   4 oua
   1/4 lingurita sare

 Pt crema:
   120 g zahar pudra
   4 galbenusuri
   80 g faina
   450 ml lapte
   100 g unt
   vanilie
   50 ml Baileys

 Pt glazura:
   100 g ciocolata

Cum se face:

Incepem cu aluatul: punem la fiert apa cu untul si sarea, pana cand untul este topit si incepe sa fiarba.


Adaugam toata faina odata, luam de pe foc si amestecam bine continuu pana cand aluatul incepe sa se dezlipeasca de pe peretii cratitei. Incepea sa se ingroase:


Cand incepe sa se intareasca putin mai tare aluatul e gata, il dam deoparte sa se raceasca putin pana cand putem tine un deget in el fara eforturi mari.


Cand aluatul s-a racit putin, incepem sa adaugam cate un ou pe rand, amestecand foarte bine inainte de a-l pune pe urmatorul.


Dupa ce am incorporat toate ouale, ne pregatim sa facem gogoselele.
Preincalzim cuptorul la 185 grade si tapetam o tava intinsa cu hartie de copt. Cu o lingura sau utilizand o punga posh incepem sa punem in tava gramajoare mici spiralate din aluatul obtinut (sau betisoare daca vrem sa obtinem forma de eclere) cu o distanta intre ele, pentru ca se umfla destul de tare in cuptor.


Dam tava la cuptor pentru aproximativ 25 de minute, pana cand choux-urile sunt frumos rumenite. Nu se deschide usa la cuptor in pimele 15 minute, altfel riscam ca gogoselele sa se dezumfle. Cand sunt gata, le scoatem din cuptor si le punem pe un gratar pentru racire.


Le taiem cu cutitul pe orizontala, pentru a fi umplute mai apoi cu crema.
Ne apucam de crema: Punem la fiert laptele cu vanilie.
Intr-un bol amestecam galbenusurile cu zaharul pudra pana cand obtinem o crema alba. Adaugam treptat faina.


Adaugam laptele fiert, amestecam bine si punem la foc mic amestecand continuu, pana se ingroasa ca o budinca. Adaugam untul si amestecam.


 Adaugam cei 50 ml de Baileys si amestecam.(data viitoare pun mai mult)


Lasam crema sa se raceasca de tot, iar apoi umplem choux-urile.


Punem ciocolata bucati intr-o punga pe aburi pana se topeste, taiem un varf mic si glazuram choux-urile frumos.


Servim cu multa pofta :)  Bon appetit!


Mai de aproape...


Sectiune...


Crema delicioasa ce va va innebuni :)


English version            

               This year for Easter I've made 2 desserts: Snickers and Choux à la crème (we were just the two of us). I kept avoiding to prepare profiteroles because I thought they were a lot of work and I'm the type of girl that prefers to make a whole cake than small cookies :)) since my husband kept asking me to make something with lots of cream, I thought it would be the perfect moment to try the profiteroles, and it was a good decision, cause they were delicious! Let's see what profiteroles are...
               Choux à la crème, cream puffs, profiteroles or the mini shape of éclairs, are a French pastry that is made with pâte à choux, or choux pastry that is modeled into small puffs placed in the oven, filled with all sorts of cream, whipped cream, or ice cream, and topped with different sauces, like chocolate and caramel, etc. They can be also great appetizers when they're filled with salty cream, like a cheese cream, etc.
               Because I'm not a fan of pastry cream which is usually used to fill the profiteroles, I've added Baileys Irish Cream in the pastry cream base, since we love Baileys and I glazed the profiteroles with strips of melted chocolate. It resulted something amazing!!! beautiful profiteroles with lots of cream that just melt in your mouth, with a superb flavour of Baileys!
Being my first time to make these delicious cream puffs, I used Andreea's recipes from Dimineti Insorite as a guide, which I modified just a little. Thank you Andreea for the insipration!
               
Ingredients:   

 For the choux pastry:

   250 ml water
   100 g butter
   150 g flour
   4 eggs
   1/4 teaspoon salt

 For the Bailey's cream:

   120 g icing sugar
   4 egg yolks
   80 g flour
   450 ml milk
   100 g butter
   vanilla
   50 ml Baileys 

 For the topping:

   100 g chocolate

How it's made:

We start with the choux pastry: In a pot we pour the water, we add the butter and the salt and we place the pot on low heat until the butter melts and the liquid starts to boil.
We put all the flour at once in the pot, we remove the pot from the heat and we mix continuously until the dough comes off the pot walls.
We leave the dough to cool down a little bit. The dough is ready when we insert a finger in it and it's not burning our finger.
We start adding one egg at a time, mixing very well the dough before we add the next one.
We preheat the oven at 370 degrees and we place some baking paper in a baking tray.
With a spoon or with a piping bag we place small balls from the dough in the baking tray, making sure we leave some space between them, they will increase their volume in the oven.
We place the tray in the preheated oven for 25 minutes (or more) until the choux are golden brown on top. We do not open the oven in the first 15 minutes, or otherwise the choux will flatten!!!
When they're cooked, we remove them from the tray and we place them on a rack to cool completely.
We half the choux horizontally.

For the cream:
We place the milk in a pot and we place it on low heat until it starts to boil.
We mix very well the egg yolks with the sugar, until we get a white cream.
We add the flour and after that the milk, we stir very well and we place the obtained creamy liquid on low heat. We stir continuously until the cream starts to thicken, like a pudding.
We add the butter and we mix very well.
We add Baileys and we mix again, leaving the cream to cool down completely.

We fill the choux with the obtained cream.
We melt the chocolate and we glaze the choux with strips.
Delicious! Bon appetit!


Monday, April 25, 2011

Friptura de miel traditionala (Traditional Roast Lamb)

Share

Please scroll down for English version


            Luna aceasta Dulce Romanie a fost gazduit de Mimmi de la Bucate pe alese, care a propus 2 ingrediente potrivite pentru sarbatoarea de Paste: mielul si mierea. Cum eu nu sunt un fan miere si o folosesc destul de rar, o sa particip cu reteta de friptura de miel, clasica, probabil multi dintre voi o preparati la fel :)
            Chiar daca nu gatesc foarte des miel, de Paste aceasta friptura e traditionala acum la noi in casa, zic asta pentru ca in trecut nu puteam suferi nici mirosul macar, dar dupa cum vedeti gusturile se schimba cu timpul :) Din cand in cand mai prepar o tocanita de miel cu cartofi (reteta mea) sau ciorba de miel cu macris, aceasta din urma e putin mai dificila, caci nu gasesc macris pe aici, sau nu stiu sa caut :))).Dar sa revenim la reteta...Eu nu am marinat carnea caci nu am rabdarea necesara, dar daca doriti o puteti lasa in vin cu condimente vreo 6 ore inainte de a pune la cuptor. Daca stiti vreo reteta deosebita cu carne de miel, va rog sa  lasati un comment cu mai multe detalii :)  Si acum sa incepem...

Ingrediente:  

     1,5 kg carne de miel pentru friptura
     6-7 catei usturoi
     300 ml vin rosu
     putin ulei
     sare, piper


Cum se face:      

Mai intai spalam carnea foarte bine, absorbim apa de pe ea si o condimentam dupa preferinta, mie imi place simpla, ca sa iasa in relief mai bine gustul carnii.
Intr-o tava mare, punem 2 linguri de ulei si asezam carnea.


Zdrobim usturoiul , adaugam vreo 3-4 linguri de apa, amestecam si turnam peste carne din loc in loc.


Deasupra turnam 200 ml vin rosu si 2 pahare de apa.


Acoperim tava cu capac (sau foaie de staniol) si introducem tava in cuptorul preincins la 200 grade pentru primele 30 minute, dupa care reducem temperatura la 190 grade si lasam aproximativ 1 ora.
 Este indicat sa verificati din 30 in 30 minute carnea, sa vedeti daca mai e nevoie de apa.
Punem inca 100 ml vin pe final, cand carnea este aproape gata.Mai lasam 15 minute.
Luam capacul jos si lasam sa se rumeneasca pt 5 minute.
Scoasa din cuptor:


Carnea este frageda, suculenta pe interior si usor rumenita pe exterior, exact asa cum trebuie :)
Noi am servit cu garnitura de cartofi piure si salata de cruditati.


Cartofii se vad frumos, piureul il face de obicei sotul meu, ii iasa superb :)


Si carnea mai de aproape...


Din alt unghi :)


Sper ca ati avut niste Sarbatori Pascale frumoase cu cei dragi langa voi!


English version    

                  This month Dulce Romanie was organised by Mimmi from Bucate pe alese, who suggested 2 ingredients, appropriate for Easter I would say: lamb and honey. Since I'm not a huge fan of honey which I use rarely, I'll participate with my roast lamb recipe, classic, probably many of you make it the same way :)
                  Even though I don't cook lamb very often, on Easter, this roast lamb is traditional these days in our home, I'm saying these because in the past I couldn't even stand the smell of lamb, but as you can see taste changes in time :) From time to time I make lamb stew (my recipe) or a lamb soup with watercress, the soup is a little more difficult to make since I can't find watercress, or I don't know where to look for it :))). Back to the recipe...I didn't marinate the meat since I don't have the necessary patience, but if you want to marinate it, you can leave the meat with some red wine and spices to sit for 6 hours before you cook it. If you have any favorite recipes for lamb, please feel free to leave a comment with more details :) And now let's begin...
                 
Ingredients:    

     1,5 kg lamb for roasting
     6-7 garlic cloves
     300 ml red wine
     some oil
     salt, pepper


How it's made:         

We first wash the meat very well, and we absorb the water with paper towels and we spice it up by taste, I like it simple so the lamb flavour is really intense.
In a bis roasting pan we pour 2 tablespoons of oil and we place the spiced meat.
We crush the garlic and we mix it with 3-4 tablespoons of water and we pour it on top of the meat from place to place.
We pour 200 ml of red wine and 2 glasses of water, we add more salt, we cover the pan with a lid or with foil and we place the pan in the preheated oven at 400 degrees for 30 minutes, after which we reduce the temperature to 380 degrees for another hour.
I recommend you check the meat from time to time for tenderness, to add more water if it's necessary, or to reduce the temperature.  
We pour another 100 ml of wine when the meat is almost done. We leave it another 15 minutes.
When the meat is tender, we remove the lid and we let it roast nicely for 5 minutes.
Fresh from the oven:
The meat is tender, juicy on the inside and a little bit crisp on the outside, exactly like it should be :)
We served the lamb with mashed potatoes, made by my husband, who makes the best mashed potatoes in the world :)

Hope you had a wonderful Easter! (for those of you who celebrate Easter)


Saturday, April 23, 2011

Paste Fericit (Happy Easter)

Share

Please scroll down for English version


                Pentru ca mai sunt doar cateva ore pana cand crestinii sarbatoresc Pastele, vreau sa urez tuturor Paste Fericit!!! Fie ca Lumina Sfanta a acestei sarbatori sa va aduca pace in suflet, multa bucurie si intelegere langa cei dragi voua!  Sarbatori Fericite!


English version


             Because we have just a few hours until Christians celebrate Easter, I want to wish everyone a very Happy Easter! may the holy light of this feast bring you peace in your souls, a lot of joy and understanding with your dear ones! Happy Easter!


Friday, April 22, 2011

Oua rosii de Paste vopsite natural (Red Easter Eggs Naturally Dyed)

Share

Please scroll down for English version


            O traditie frumoasa ce insoteste sarbatoarea de Paste este vopsirea oualor rosii. Mama vopsea in fiecare an ouale cu foi de ceapa rosie, traditional decorate si intotdeauna rosii! Dupa acest obicei, anul acesta am incercat sa le vopsesc si eu, tot cu foi de ceapa rosie, pentru a pastra amintirea frumoasa pe care o am intiparita in minte si in suflet si fara de care parca nu sunt Pastile la fel.  Mai jos puteti citi si vedea din fotografiile pas cu pas exact cum le-am decorat si vopsit ouale astazi :) Paste Fericit tuturor si sa ciocniti cu toata lumea!

Ingrediente:  

     Oua - eu am vopsit 12
     Foi de ceapa rosie (cam de la 1 kg de ceapa)
     3 linguri otet
     1 lingurita sare
     frunze pentru decorat
     ciorap nylon
     ata


Cum se face:  

Mai intai spalam bine ouale in apa calduta. Le asezam pe servete absorbante.
Cojile de ceapa le punem in oala si turnam aproximativ 1,5 litri de apa peste ele, adaugam sarea si otetul si punem la foc mic sa fiarba timp de 20 minute.


Cand apa incepe sa se coloreze bine, ne apucam de oua. Spalam frunzele pentru decorat.


Luam un ou si asezam o frunza lipita cu fata de ou, fixand-o cu putina apa.

 
Asezam oul in ciorap cu grija, pentru an nu deranja frunza.


Ciorapul il strangel usor la spate, il rasucim si il legam cu ata.


  Taiem ciorapul pe langa ou, il punem deoparte si continuam cu celelalte oua. Puteti sa puneti si cate 2 frunze, daca doriti.


Verificam culoarea din apa si punem ouale usor in oala, acoperindu-le cu foile de ceapa.(eu le-am incalzit in putina apa mai intai ca sa nu crape)


Lasam sa fiarba la foc mic timp de 20-30 minute, pana cand va convine culoarea obtinuta.
Cand sunteti multumiti de nuanta, scoateti ouale din apa, si lasati-le sa se raceasca putin pe servet de hartie.
Luati jos ciorapul si frunzele si dati ouale cu putin ulei pentru luciu. Et Voila!


Ouale sunt frumoase, cu o culoare intensa, exact asa cum imi plac :)


 Frumoase si naturale :) Le-as fi asezat in cos cu iarba proaspata, doar ca aici a fost asa de frig in ultima vreme, ca iarba e tare mica :)


Paste Fericit tuturor!!!


English version                    

             On Easter a very beautiful tradition is to dye the eggs red. My mother used to dye eggs each year using red onion skins, traditionally decorate them and always red!!! Following this tradition, I've tried to dye them myself this year, with onion skins as well, to keep fresh the beautiful memory I have written in my mind and soul, without which Easter isn't really the same for me. You can scroll down and read and see my step by step photos exactly how I decorated and dyed the eggs today :) Happy Easter everyone!
            

Ingredients:    

     Eggs - I've dyed 12 
     Red onion skins - from 1.5 kg of red onion
     3 tablespoons white vinegar
     1 teaspoon salt
     leaves to decorate
     nylon stockings
     some thread

How it's made:   

We first wash the eggs very well with warm water. We place the eggs on paper towels.
We place the red onion skins in a pot and we pour 1,5 litres of water on them, we add salt and vinegar and we place it on low heat to boil for 20 minutes.
When the water starts to color nicely, we prepare the eggs. We wash the leaves and set them aside.
We take an egg and place a leaf on the egg face down, fixing it with a drop of water.
We place the egg in nylon stocking, without messing the leaf, and we twist it at the back and tie it with some thread.
We cut the stocking and set aside the egg, and continue with the rest of the eggs.
When we are finished with the decorating, we place the eggs in the pot gently and cover with onion skins (I first placed the eggs in some warm water before I placed them in the pot, not to crack).
We let the eggs boil for 20-30 minutes, until we have the desired color.
We take out the eggs gently and we place them on paper towels, leaving them to cool down a little bit (2 min)
 We remove the nylon stocking, oiling the eggs a bit, so they shine nicely. Et Voila!
The eggs are beautiful, with an intense color, exactly how I like them :)
Beautiful and natural, I would've placed them in a basket filled with fresh grass, but it was so cold lately in Toronto, that the grass is kind of absent, or too small :)
Happy Easter everyone!

        
Related Posts Plugin for WordPress, Blogger...