Showing posts with label reteta pas cu pas (step by step recipe). Show all posts

Friday, August 3, 2012

Baclava (Baklava)

Share


            Eu credeam ca baclavaua este extrem de complicat de facut si nici intr-un caz nu am indraznit pana acum sa experimentez. Cat de tare m-am putut insela nici acum nu-mi vine se cred :) desi mi se face foarte rar dor de gustul minunatului desert turcesc, trebuie sa recunosc ca baclavaua e una din prajiturile cele mai bune testate de mine! e dulce, aromata din cale afara si partea cea mai buna e ca nu poti manca foarte mult, deci nu te simti vinovat :)) postez reteta acum deoarece pentru mine baclavaua e un desert specific verii, nu ma intrebati de ce :) Pentru prima mea data cand o prepar a iesit grozav de bine zic eu, desi am invatat cate una alta si next time va fi sigur updated!
            I used to think that Baklava is a really sophisticated dessert to make and I didn't dare to explore this one. Oh boy, I can't believe how wrong I was :) though I rarely miss the taste of the wonderful Turkish dessert, I gotta admit that it's one of the best pastries I ever tasted! it's sweet, very flavorful and the best part is you can't eat too much of it, so you don't feel guilty :)) I'm posting the recipe now because Baklava is a summer dessert, don't ask me why though :) For my first time making I think it turned out great, though I learned some things now and it'll be updated by next time!


Ingrediente/Ingredients:                                                                          

Pentru foi/For the layers:
1 pachet de foi de placinta/1 package phyllo pastry
350 g nuca macinata/350 g ground walnuts
2 linguri zahar/2 tablespoons with sugar
1/2 lingurita scortisoara/1/2 teaspoon with cinnamon 
150 g unt/150 g butter

Pentru sirop/For the syrup:
 250 ml apa/250 ml water
 250 g zahar/250 g sugar
 2 linguri miere de albine/2 tablespoons with honey
 sucul de la 1/2 lamaie/juice from 1/2 lemon

Tava cu dimensiuni: 33 cm/22,9 cm/5,08 cm/Pan dimensions: 33cm/22,9 cm/5,08 cm


Cum se face/How it's done:


Mai intai preparam siropul: punem la fiert apa cu zaharul pentru vreo 15 minute cand incepe sa se ingroase usor. Dupa ce luam de pe foc, adaugam sucul de lamaie si mierea, amestecam si lasam sa se raceasca.
We first make the syrup: we boil the water with the sugar for 15 minutes until it begins to thicken a bit.We   remove it from the heat and we add the lemon juice and the honey, we stir and we let it cool.
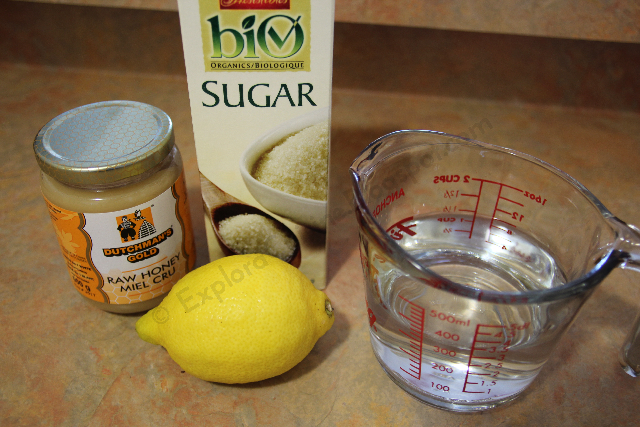


Apoi, ne ocupam de foi. Totul merge foarte rapid daca le aveti toate la indemana. 
Then we make the layers. Everything goes smoothly if you have all you need handy.

 Desfacem pachetul de foi (decongelate in prealabil) si le punem sub un prosop umed ca sa le putem manevra mai usor. Punem untul topit si nuca amestecata cu zahar si scortisoara la indemana. Aducem tava si o pensula de bucatarie pentru a ne fi mai usor.
We take the phyllo layers out (they have to be thawed) and we place them under a wet towel so we can easily use them. We bring the melted butter and the walnuts mixed with sugar and cinnamon close and also the pan and a pastry brush to make things easier.
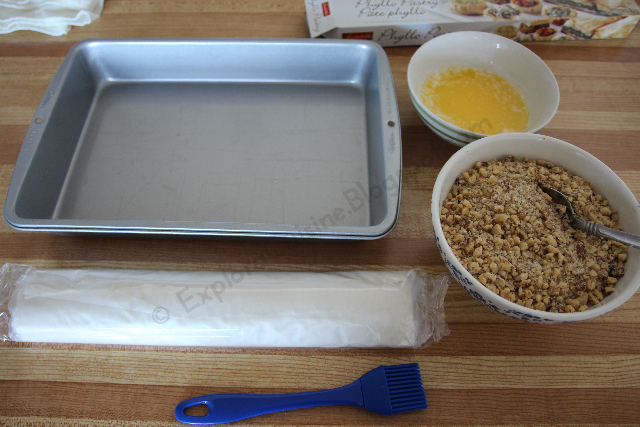

Impartim foile in 4-5 straturi, depinde cate vrem sa facem. Eu am facut 4 straturi, 3 cu cate 5 foi iar ultimul cu 4 foi; citisem undeva ca nu e bine sa fie foarte multe foi la ultimul strat. Sa fiti atenti la cat sunt de mari foile fata de tava, eu le-am lasat asa cu marginile pe langa tava, dar am vazut apoi ca e mai bine sa le tai sa fie la dimensiunea tavii. Foile trebuiesc unse foarte bine cu unt, deci fiti siguri ca aveti destul unt topit.
       Ungem tava cu unt bine si luam prima foaie de placinta, o punem in tava si o ungem cu unt topit bine. De fiecare data acoperim restul de foi cu prosopul umed (vedeti la mine in in stanga in poza)
We divide the sheets in 4-5 batches, depending on how many we want to use. I used 4 batches, 3 of 5 phyllo sheets and the one on top of 4 sheets; I've read somewhere that it's not recommended to use too many phyllo sheets on the top. Be careful to cut the layers according to the pan you'll use, I've left mine too big for the pan and then I've noticed it would've been easier to cut them. All phyllo sheets have to be very well brushed with melted butter so make sure you have enough of it. 
        We grease the pan very well with butter and then we add the first sheet of phyllo, and we brush it very well with butter on top. Every time we take a sheet, we cover the rest with the wet towel (you can see it in the left in my pic)
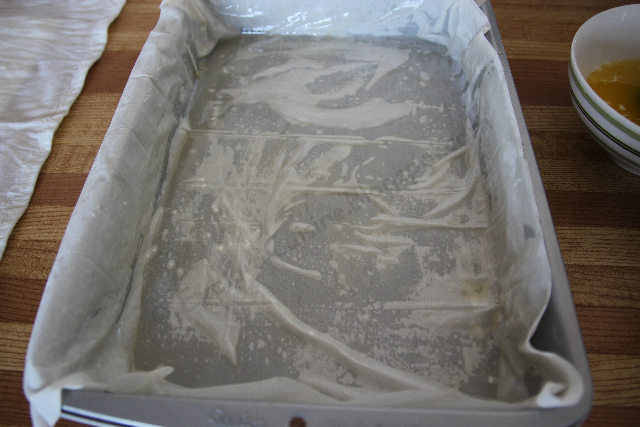

Continuam sa ungem cu unt alte 4 foi, exact la fel. Peste a 5-a foaie adaugam o treime din cantitatea de nuca, presarand uniform.
We continue to brush with butter other 4 sheets exactly the same way. On top of the 5th one we add a third part of the walnuts, spreading it well.
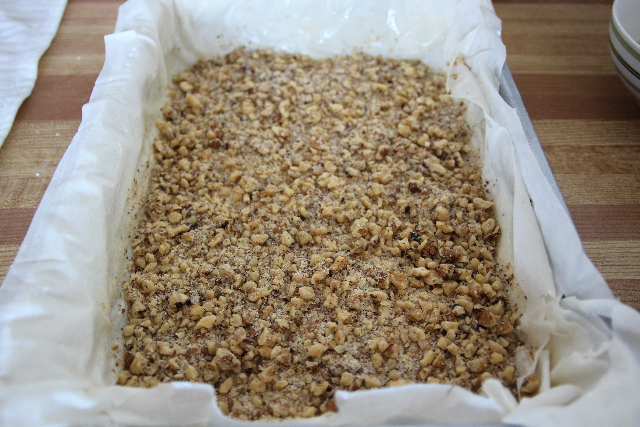

Continuam la fel cu alte 5 foi, iarasi nuca, etc pana terminam cantitatile. Nu uitati sa pensulati cu unt fiecare foaie in parte. Ultimul strat va fi de 4 foi unse. Dupa ce ungem foarte bine ultima foaie, cu un cutit foarte bine ascutit, taiem bucati baclavaua dupa modelul dorit.
We continue with another 5 sheets, again walnuts, etc, until we finish our layers. Don't forget to brush very well with butter each phyllo sheet. The last batch will be of 4 phyllo sheets. After we brush it with butter, using a very sharp knife we cut the baclava by the pattern we like.
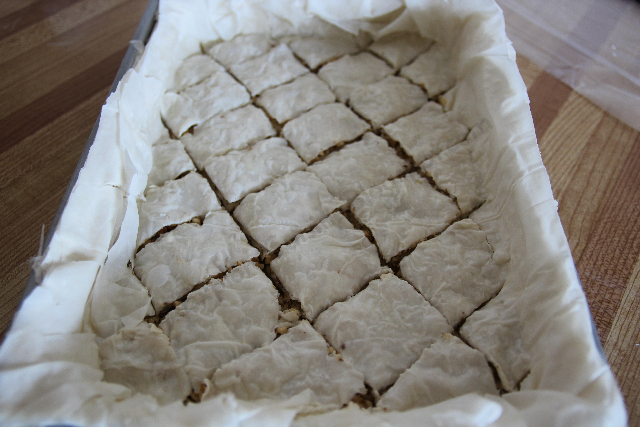

Dam tava la cuptorul preincalzit la 185 grade pentru aproximativ 30 de minute, pana capata o culoare aurie frumoasa.
We place the pan in the preheated oven at 370 degrees for about 30 minutes, until it gets a beautiful golden color.
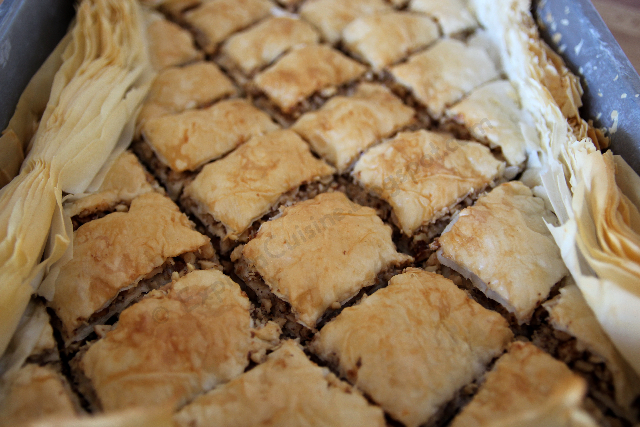

Dupa ce o scoatem din cuptor, punem siropul racit peste baclava. Nu va speriati ca ramane in tava sirop, acesta se va absorbi dupa ce sta baclavaua.
After we take it out from the oven, we pour the cooled syrup on top. Don't be afraid it's too much syrup, the pastry will absorb everything in a couple of hours. 
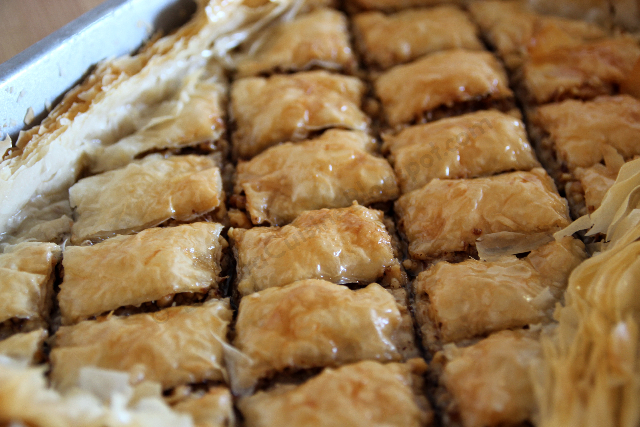

O lasam neacoperita vreo 3-4 ore bune, iar apoi o transferam in frigider, daca mai apuca :) Scoatem cateva bucatele si ne minunam cat poate fi de buna :)
We let it uncovered for 3-4 hours, and then we transfer it in the fridge, if you still have anything to be transferred :) We take out a couple of slices and we enjoy the marvelous taste it has :)
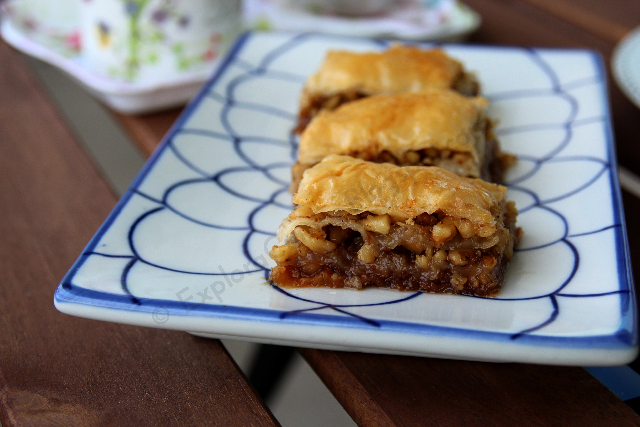

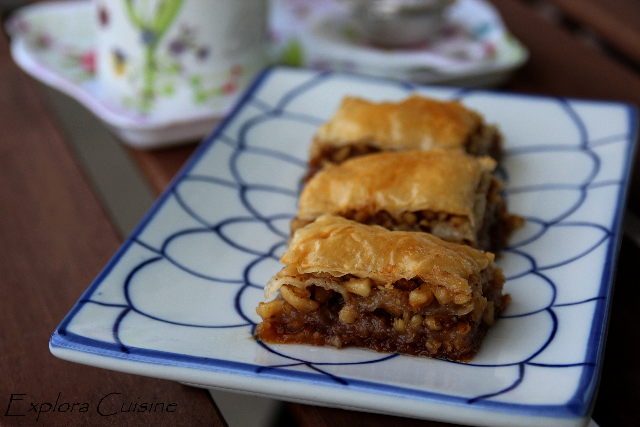
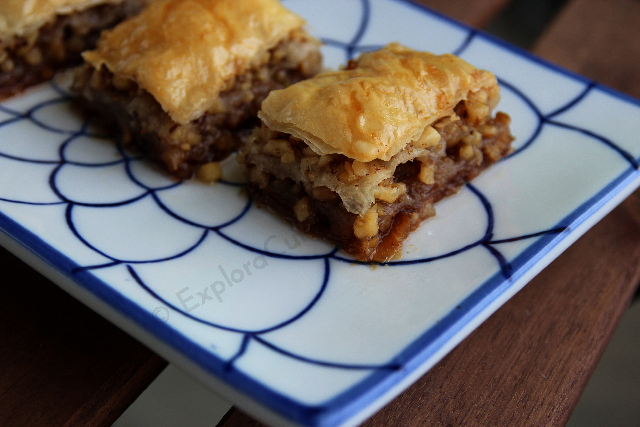
Dupa cum vedeti in poze, prima mea baclava e destul de micuta, data viitoare am sa o fac mai inalta din mai multe straturi. Altfel, mi s-a parut delicioasa, potrivit de dulce si zemoasa exact cat trebuie, ca mie nu-mi place deloc cea uscata rau :) va invit cu drag sa savurati o bucatica lipicioasa si aromata langa o cana de cafea, sau un ceai cum am facut eu! Bon appetit!
As you can see, my first time baklava is a bit short, next time I'm gonna make it taller using more phyllo sheets. Otherwise I found it to be delicious, not too sweet and just as juicy as I like it, I personally don't enjoy the dried out baklava :) I do invite all of you to have a sticky and flavorful piece next to a cup of coffee or a cup of tea, as I had! Bon appetit!


Wednesday, June 27, 2012

Chiftele de zucchini (Zucchini Fritters)

Share


    Am vrut neaparat sa particip din nou la provocarea Dulce Romanie, Provocarea Lunii Iunie fiind organizata de Andie de la Andie's Veggies si care are ca tema un preparat vegetarian. Mi s-a parut foarte buna ideea asa ca musai sa particip si eu cu o reteta, ca daca eram mai inspirata putin participam si cu Prajitura cu capsuni. Blogul lui Andie este unul foarte dragut cu multe retete sanatoase pe care va invit cu drag sa-l vizitati, mai ales ca provocarea aceasta va fi de senzatie, sunt sigura!
    Am cumparat cam mult zucchini si dupa ce am facut pentru a zecea mia oara un minunat tian de legume cu el, ce mi-a ramas am folosit la chiftele de zucchini, o reteta care ne place destul de mult, tinand cont de faptul ca eu nu sunt mare fan dovlecei in general. Am pus totul pe masa si m-am apucat de treaba, ca doar e tare simplu si poti jongla cu ingredientele! Va sfatuiesc sa le incercati ca sunt foarte gustoase, le puteti servi la micul dejun, cina sau pachetel la munca. Banuiesc ca sunt mai light daca le faceti la cuptor, eu una am preferat sa le prajesc, gustul e mult mai intens asa, dupa parerea mea :)
    I really wanted to participate in June's Sweet Romania Challenge hosted by Andie from Andie's Veggies, which has a vegetarian dish as a theme. I thought it's a great theme so I decided to send a recipe, though if I were more inspired I would've send my Strawberry Cake recipe as well. Andie's blog is very cozy with lots of healthy recipes and I invite all of you to check it out, now that this challenge will really be a great one!
    I bought too much zucchini and after I've made for the thousand time the wonderful Vegetable Tian, I used  the rest of zucchini to make some Zucchini Fritters, a recipe that we truly enjoy, considering that I'm not a huge fan of this vegetable. I've put everything on the table and started cooking, since it's easy to make and you can play with ingredients. I advise you to try them out because they're very tasty and you can serve them at breakfast, dinner or at lunch. I guess baking them would make them lighter, I preferred to fry them, I find the taste more intense when fried :)


Ingrediente/Ingredients:                                                       

3 zucchini medii/3 medium zucchini
2 oua/2 eggs
50 g parmezan/50 g parmesan
50 g pesmet/50 g bread crumbs
100 g faina alba/100 g white flour
4-5 catei usturoi/4-5 garlic cloves
patrunjel verde/fresh parsley
sare, piper/salt, pepper
ulei pt prajit/oil for frying

Cum se face/How it's done:

Spalam zucchini-ul bine si il dam pe razatoare cu tot cu coaja, adaugam sare si lasam sa stea vreo 15 minute pentru a elibera zeama.
We wash the zucchini and we grate it with the peel on, we add salt and we let it sit for 15 minutes so we can drain the water.


Cu mainile stoarcem zucchini de zeama lasata si adaugam ouale, faina, pesmetul, parmezanul, usturoiul zdrobit, patrunjelul tocat, sare si piper dupa gust si amestecam bine.
With our hands we drain the zucchini and we add eggs, flour, bread crumbs, parmesan, crushed garlic, chopped parsley, salt and pepper to taste and we mix them all together.


Intr-o tigaie incingem ulei si luam cu lingura din compozitie, formand chiftele pe care le prajim cate 2-3 minute pe fiecare parte pana au o culoare maronie.(mie imi plac prajite bine)
We heat the oil in a skillet and we use a spoon to form the fritters which we fry 2-3 minutes on each side until they get a nice golden brown color.(I like them well fried)


Le scoatem pe servete de hartie sa absoarba uleiul.
We take them out on paper towels to absorb the oil.


Servim chiftelele cu sos de iaurt si patrunjel verde sau legume proaspete langa si cu multa pofta :) la cat de bine miroase, ai manca cu cate 2 maini, pe cuvant!
We serve the fritters with a yogurt and parsley dip or with fresh vegetables; they smell so delicious that you wanna eat with 2 hands, trust me!


Mai de aproape...Bon appetit!/Closer...Bon appetit!


Thursday, August 4, 2011

Thai Cuisine: Stir Fry de porc, ardei si lemongrass (Stir Fried Pork with Peppers and Lemongrass)

Share

   
        E timpul pentru o noua reteta din bucataria thailandeza, de care eu m-am indragostit cumplit!!! de data aceasta am ales sa folosesc si lemongrass, o planta cu aroma de lamaie ce creste in Filipine si care este des folosita in mancarurile asiatice; eu am folosit lemongrass proaspat, dar se poate folosi si uscat sub forma de pudra. Carnea de porc cu ardei si lemongrass are un gust absolut superb iar pranzul nostru e gata in maxim 10 minute, ca de altfel toate mancarurile asiatice :)
       It's time for a new Thai recipe, a cuisine I'm totally in love with btw!!! this time I chose to use Lemongrass, a herb with a subtle citrus flavor that grows in Philippines and which is often used in Asian cuisine; I used it fresh, but it can also be used dried and powdered. Lunch is ready in 10 minutes and it's super tasty, like all Asian recipes for that matter :) Enjoy!


Ingrediente/Ingredients:  

 350 g carne de porc/350 g pork
 2 linguri sos de soia/2 tablespoons with soy sauce
 1 lingura zahar brun/1 tablespoon w brown sugar
 1/2 lingura pasta de ansoa/1/2 tablespoon w anchovy paste (fish sauce)
 1 lingurita amidon/1 teaspoon cornstarch
 1/2 lingurita sare/1/2 teaspoon w salt

 1/2 ceapa rosie/1/2 red onion
 2 catei de usturoi/2 garlic cloves
 2 ardei colorati/2 colored peppers
 1 tulpina lemongrass/1 lemongrass stalk
 2 fire ceapa verde/2 green onions

Cum se face/How it's made:


Mai intai facem marinada pentru carne. Intr-un vas mic punem sosul de soia, zaharul brun, pasta de ansoa, amidonul si sarea si amestecam foarte bine. Carnea o taiem fasii subtiri, o amestecam cu sosul si o dam la frigider pt 1 ora.
We first make the marinade for the meat. In a small bowl we combine soy sauce, brown sugar, anchovy paste, cornstarch and salt. We cut the pork in thin strips and we mix them well with the sauce. We marinate them for 1 hour in the fridge.


Curatam si tocam ceapa si usturoiul iar ardeiul il taiem fasii subtiri. Curatam lemongrass-ul si tocam marunt partea alba din mijloc.(il vedeti cum arata in imaginea cu ingredientele)
We peel and chop the onion and garlic and we cut the pepper in thin strips. We peel the lemongrass and we chop the middle part of the white part.(you can see it in the ingredients picture)


Incalzim wok-ul sau o tigaie mare si punem in o lingura de ulei ceapa si usturoiul tocat si le prajim la temperatura ridicata pt 1 minut.(stir fry)
We heat up 1 tablespoon with vegetable oil in a wok or a big skillet and we stir fry the onion with the garlic for 1 minute.


Adaugam ardei si lemongrass si continuam sa prajim pt alte 2 minute, amestecand mereu.
We add the pepper and lemongrass and we stir fry them together for 2 minutes.      


Adaugam carnea de porc marinata si prajim totul pana cand carnea e facuta, amestecand continuu.
We add the marinated meat and we stir fry everything until the meat is done. 


Cand carnea e gata, adaugam si ceapa verde tocata marunt, potrivim de sare si piper si mai prajim pt 2 minute.
When the meat is done we add the chopped green onion, we sprinkle salt and pepper if needed and we stir fry for another 2 minutes.


Servim cu garnitura de orez sau taitei de orez. Bon appetit!
We serve with rice as a side dish or rice noodles. Bon appetit!            


Super bun si se poate face si cu pui sau vita daca preferati!
Super tasty and it can also be made with chicken or beef if you like!


Mai de aproape.../Closer...


Thursday, July 28, 2011

Tort cu mousse de piersici, musetel si mure (Peach, Chamomile & Blackberry Mousse Cake)

Share


        Din cauza caldurii maxime ce a cuprins Toronto saptamana trecuta, cand s-au simtit si peste 49 grade Celsius, trebuie sa recunosc ca mi-a scazut de tot dorinta de a trebalui prin bucatarie, de aceea am lipsit putin de pe blog...dar I'm back now si cu ce altceva daca nu cu un tort super fin si aromat de vara ce te face realmente sa visezi! Desi pozele nu mi-au iesit tocmai bine, tortul a fost o minunatie, combinatia de arome este absolut divina!
        Because of the hot weather from last week, when in some days it felt like 49 degrees C, I have to admit that my desire to cook was pretty absent, that's why I didn't post anything for a while now...but I'm back now and what else could I post if not a gorgeous cake recipe, a very elegant and flavorful summer cake that makes you dream! though the pictures aren't really good, this cake was wonderful, the flavor combination is divine!

Ingrediente/Ingredients:

1 blat de tort din 3 oua pt o tava de 23 cm diametru, puteti vedea aici cum se face/1 sponge cake for a 23 cm round cake pan, you can see here how it's made

250 g mure/250 g blackberries
2 piersici/2 peaches
1 lingura flori de musetel/1 tablespoon with chamomile buds
60 ml apa/60 ml water
500 ml frisca lichida/500 ml liquid cream
20 g gelatina/20 g gelatine
80 g zahar/80 g sugar
fructe pt decor/fruits for decoration

Cum se face/How it's made:


Mai intai facem pandispanul din 3 oua. Il lasam sa se raceasca pe un gratar si ne apucam de mousse-uri.
Mousse-ul de piersici si musetel:
Fierbem 60 ml apa cu florile de musetel 2-3 minute.
We first make the sponge cake. We let it cool on a rack and we start making the mousses.
Peach and Chamomile mousse:
We simmer 60 ml water with the chamomile buds for 2-3 minutes.


Strecuram ceaiul obtinut si lasam sa se raceasca.
Curatam piersicile de coaja si le zdrobim cu un mixer vertical pana obtinem un suc gros.
We drain the tea and we let it cool.
We peel the peaches and we blend them with a vertical blender until we obtain a thick juice.


 Adaugam 40 g de zahar si ceaiul de musetel si amestecam. Dizolvam 10 g de gelatina conform instructiunilor de pe pachet si o incorporam in sucul de piersici.
We add 40 g sugar and the chamomile tea to the juice and we stir. We dissolve 10 g of gelatine according to the instructions on the package and we gently add it to the juice.


Mixam 250 ml frisca si cand frisca s-a intarit adaugam si sucul de piersici, amestecand usor cu o lingura. O dam la frigider pt 10 minute sa se intareasca putin.
We whip 250 ml of cream and when it's whipped we add the peach juice, gently stirring with a spoon. We place it in the fridge for 10 minutes so it thickens a little.  


Punem mousse-ul de piersici peste blatul de tort racit in tava in care l-am copt. Punem tava in frigider pana cand facem mousse-ul de mure.
We place the peach mousse on top of the sponge cake. We place it in the fridge until we make the blackberry mousse.


Mousse de mure:
 Zdrobim murele cu un mixer si sucul obtinut cu 40 de g zahar il punem la foc mic pentru 5 minute. Dupa aceea dam prin strecuratoare sosul pentru a indeparta samburii si adaugam cele 10 g de gelatina dizolvata si amestecam usor. Lasam sa se raceasca complet.
Blackberry mousse:
We smash the blackberries with the blender and we place the juice in a small pot on low heat, adding 40 g of sugar and we let it simmer for 5 minutes. After that we drain the juice using a sieve so we remove the seeds and we add the 10 g of gelatine already dissolved. We mix gently and we let it cool completely.


Mixam 250 ml frisca ramasa si cand e tare adaugam sosul de mure amestecand usor cu o lingura.
We whip the cream and when it's whipped we add the blackberry sauce gently mixing with a spoon.


Mousse-ul il punem deasupra in tava peste mousse-ul de piersici si nivelam frumos. Dam la frigider pentru 3-4 ore. Eu am ornat tortul simplu cu mure si piersici.
We pour the mousse on top of the peach mousse and we level it nicely. We place the cake in the fridge for 3-4 hours. I decorated the cake very simple with blackberries and peach.


O felie delicioasa si colorata/ A delicious and colorful slice:


Inca una/ One more


Mai de aproape :)/Closer :) Bon appetit!!!

Sunday, July 17, 2011

Frigarui de porc cu legume (Pork Skewers with Vegetables)

Share

 
        Nu am mai postat nimic cu carne de foarte multa vreme, si cum afara vremea ne permite sa ne desfasuram  in voie, m-am gandit ca ar fi momentul sa postez reteta de frigarui :) toata lumea face frigarui, simple, cu legume, cu tot felul de sosuri, mie personal imi plac cel mai mult cu legume, pentru o aroma mai frumoasa. Sunt o nebunie langa o sticla de bere si un pahar de vorba cu prietenii!
        I haven't posted anything with meat in a while now, and since outside the weather is perfect for us to barbecue, I thought it's time for me to post my meat Skewers recipe :) everybody likes skewers, plain, with vegetables or with different sauces; I personally like the vegetable and meat combination, for a more intense flavor. They're yummy with a cold bottle of beer while chatting with friends!

Ingrediente/Ingredients:

 carne de porc/pork
 ardei rosu/red pepper
 ardei verde/green pepper
 ceapa rosie/red onion
 ciuperci albe mici/small white mushrooms
 sos pt marinat/marinating sauce
 sare/salt
 bete/skewers


Cum se face/How it's made:


Taiem carnea cuburi 2-3 cm si o marinam cu sos facut in casa sau cumparat in cazul meu.
We cut the meat in 2-3 cm cubes and we marinate it with homemade sauce or bought in my case.


Curatam legumele si le taiem in patrate de marime similara cu carnea, lasam intregi ciupercile si ne apucam de asamblat frigaruile.
We wash and peel the vegetables and we cut them in cubes with similar in size to the meat, we leave the mushrooms whole and we start assembling the skewers.


Punem componentele pe bete si presaram sare/We place everything on skewers and we sprinkle with salt.


Incingem gratarul si punem frigaruile (se pot face si in casa in tigaie grilata sau in cuptor pe hartie de copt)
We heat up the grill and we place the skewers (you can make them indoors in a grill pan or in the oven on baking paper)

  
Gata prajite:/Grilled


Mai de aproape, mmmm, ce miros divin!!!/Closer, what an amazing smell!!!


Servim cu o bere rece langa :)/We serve with a cold bottle of beer :)  Bon appetit!


Related Posts Plugin for WordPress, Blogger...