Thursday, July 28, 2011

Tort cu mousse de piersici, musetel si mure (Peach, Chamomile & Blackberry Mousse Cake)

Share


        Din cauza caldurii maxime ce a cuprins Toronto saptamana trecuta, cand s-au simtit si peste 49 grade Celsius, trebuie sa recunosc ca mi-a scazut de tot dorinta de a trebalui prin bucatarie, de aceea am lipsit putin de pe blog...dar I'm back now si cu ce altceva daca nu cu un tort super fin si aromat de vara ce te face realmente sa visezi! Desi pozele nu mi-au iesit tocmai bine, tortul a fost o minunatie, combinatia de arome este absolut divina!
        Because of the hot weather from last week, when in some days it felt like 49 degrees C, I have to admit that my desire to cook was pretty absent, that's why I didn't post anything for a while now...but I'm back now and what else could I post if not a gorgeous cake recipe, a very elegant and flavorful summer cake that makes you dream! though the pictures aren't really good, this cake was wonderful, the flavor combination is divine!

Ingrediente/Ingredients:

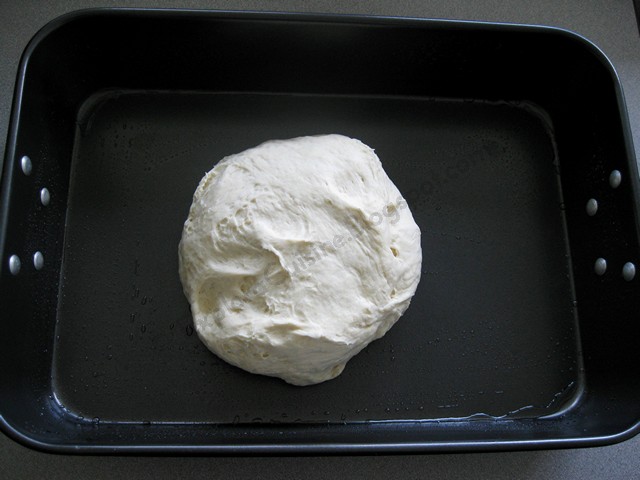
1 blat de tort din 3 oua pt o tava de 23 cm diametru, puteti vedea aici cum se face/1 sponge cake for a 23 cm round cake pan, you can see here how it's made

250 g mure/250 g blackberries
2 piersici/2 peaches
1 lingura flori de musetel/1 tablespoon with chamomile buds
60 ml apa/60 ml water
500 ml frisca lichida/500 ml liquid cream
20 g gelatina/20 g gelatine
80 g zahar/80 g sugar
fructe pt decor/fruits for decoration

Cum se face/How it's made:


Mai intai facem pandispanul din 3 oua. Il lasam sa se raceasca pe un gratar si ne apucam de mousse-uri.
Mousse-ul de piersici si musetel:
Fierbem 60 ml apa cu florile de musetel 2-3 minute.
We first make the sponge cake. We let it cool on a rack and we start making the mousses.
Peach and Chamomile mousse:
We simmer 60 ml water with the chamomile buds for 2-3 minutes.


Strecuram ceaiul obtinut si lasam sa se raceasca.
Curatam piersicile de coaja si le zdrobim cu un mixer vertical pana obtinem un suc gros.
We drain the tea and we let it cool.
We peel the peaches and we blend them with a vertical blender until we obtain a thick juice.


 Adaugam 40 g de zahar si ceaiul de musetel si amestecam. Dizolvam 10 g de gelatina conform instructiunilor de pe pachet si o incorporam in sucul de piersici.
We add 40 g sugar and the chamomile tea to the juice and we stir. We dissolve 10 g of gelatine according to the instructions on the package and we gently add it to the juice.


Mixam 250 ml frisca si cand frisca s-a intarit adaugam si sucul de piersici, amestecand usor cu o lingura. O dam la frigider pt 10 minute sa se intareasca putin.
We whip 250 ml of cream and when it's whipped we add the peach juice, gently stirring with a spoon. We place it in the fridge for 10 minutes so it thickens a little.  


Punem mousse-ul de piersici peste blatul de tort racit in tava in care l-am copt. Punem tava in frigider pana cand facem mousse-ul de mure.
We place the peach mousse on top of the sponge cake. We place it in the fridge until we make the blackberry mousse.


Mousse de mure:
 Zdrobim murele cu un mixer si sucul obtinut cu 40 de g zahar il punem la foc mic pentru 5 minute. Dupa aceea dam prin strecuratoare sosul pentru a indeparta samburii si adaugam cele 10 g de gelatina dizolvata si amestecam usor. Lasam sa se raceasca complet.
Blackberry mousse:
We smash the blackberries with the blender and we place the juice in a small pot on low heat, adding 40 g of sugar and we let it simmer for 5 minutes. After that we drain the juice using a sieve so we remove the seeds and we add the 10 g of gelatine already dissolved. We mix gently and we let it cool completely.


Mixam 250 ml frisca ramasa si cand e tare adaugam sosul de mure amestecand usor cu o lingura.
We whip the cream and when it's whipped we add the blackberry sauce gently mixing with a spoon.


Mousse-ul il punem deasupra in tava peste mousse-ul de piersici si nivelam frumos. Dam la frigider pentru 3-4 ore. Eu am ornat tortul simplu cu mure si piersici.
We pour the mousse on top of the peach mousse and we level it nicely. We place the cake in the fridge for 3-4 hours. I decorated the cake very simple with blackberries and peach.


O felie delicioasa si colorata/ A delicious and colorful slice:


Inca una/ One more


Mai de aproape :)/Closer :) Bon appetit!!!

Sunday, July 17, 2011

Frigarui de porc cu legume (Pork Skewers with Vegetables)

Share

 
        Nu am mai postat nimic cu carne de foarte multa vreme, si cum afara vremea ne permite sa ne desfasuram  in voie, m-am gandit ca ar fi momentul sa postez reteta de frigarui :) toata lumea face frigarui, simple, cu legume, cu tot felul de sosuri, mie personal imi plac cel mai mult cu legume, pentru o aroma mai frumoasa. Sunt o nebunie langa o sticla de bere si un pahar de vorba cu prietenii!
        I haven't posted anything with meat in a while now, and since outside the weather is perfect for us to barbecue, I thought it's time for me to post my meat Skewers recipe :) everybody likes skewers, plain, with vegetables or with different sauces; I personally like the vegetable and meat combination, for a more intense flavor. They're yummy with a cold bottle of beer while chatting with friends!

Ingrediente/Ingredients:

 carne de porc/pork
 ardei rosu/red pepper
 ardei verde/green pepper
 ceapa rosie/red onion
 ciuperci albe mici/small white mushrooms
 sos pt marinat/marinating sauce
 sare/salt
 bete/skewers


Cum se face/How it's made:


Taiem carnea cuburi 2-3 cm si o marinam cu sos facut in casa sau cumparat in cazul meu.
We cut the meat in 2-3 cm cubes and we marinate it with homemade sauce or bought in my case.


Curatam legumele si le taiem in patrate de marime similara cu carnea, lasam intregi ciupercile si ne apucam de asamblat frigaruile.
We wash and peel the vegetables and we cut them in cubes with similar in size to the meat, we leave the mushrooms whole and we start assembling the skewers.


Punem componentele pe bete si presaram sare/We place everything on skewers and we sprinkle with salt.


Incingem gratarul si punem frigaruile (se pot face si in casa in tigaie grilata sau in cuptor pe hartie de copt)
We heat up the grill and we place the skewers (you can make them indoors in a grill pan or in the oven on baking paper)

  
Gata prajite:/Grilled


Mai de aproape, mmmm, ce miros divin!!!/Closer, what an amazing smell!!!


Servim cu o bere rece langa :)/We serve with a cold bottle of beer :)  Bon appetit!


Wednesday, July 13, 2011

Focaccia cu usturoi si oregano (Garlic and Oregano Focaccia)

Share

        Chiar daca afara e foarte cald pofta e totusi gigantica, mai ales cand vad la altii pe blog :)) inspirata de reteta Ana Mariei de la Just Love Cookin', m-am apucat de dimineata sa pregatesc o focaccia minunata, care zic eu ca a iesit destul de bine pentru prima data :) a meritat cu varf si indesat sa suport cateva grade in plus in casa, doar ca sa simt pentru cateva minute mirosul incredibil ce venea din cuptor!!! OMG, deci e o reteta ce clar se potriveste cu sloganul blogului meu : Explore the flavour! God, daca ar exista device-uri pentru inregistratul mirosului, focaccia aceasta s-ar califica garantat pentru testare :))) va provoc sa riscati o ora dimineata pentru aceasta minunatie care va va deschide usa spre paradisul aromelor, da ati inteles bine, doar o ora cu totul, e super rapid procesul cu un rezultat ce mie mi-a depasit asteptarile! Sa vedem cum se face, eu am adaptat usor reteta dupa gustul meu :)
        Even though it's hot outside I'm  still craving for some things, even more when I see stuff on blogs :) inspired by Ana Maria's recipe from Just Love Cookin', in the morning I started making a wonderful Focaccia Bread, which I dare to say turned out pretty good for my first time :) the degrees in the house were well worth compared to the smell that came from the oven!!! OMG, this is a recipe that fits my blog's motto: Explore the flavor! God, if there were any devices for recording the smell, this Focaccia would certainly qualify for testing :))) I dare you all to take one hour in the morning and prepare this yummyness which will open the door to the  paradise of flavors, yes, you read correctly, just an hour, it's super fast with a result that really exceeded my expectations! Let's see how it's made, I slightly adapted the recipe according to my own taste :)


Ingrediente/Ingredients:

500 g faina/500 g all purpose flour
300 ml apa carbogazoasa/300 ml carbonated water
25 g drojdie proaspata/25 g fresh yeast
40 ml ulei de masline/40 ml olive oil
1 lingurita sare/1 teaspoon with salt
1 lingurita zahar sau miere/1 teaspoon with sugar or honey
3 catei usturoi/3 garlic cloves
oregano/oregano 

Cum se face/How it's made:   

Incalzim apa cat sa fie calduta si dizolvam drojdia si zaharul in ea, apoi adaugam si uleiul de masline si amestecam. Turnam lichidul in bolul cu faina amestecata cu sare si usturoi zdrobit.
We heat the water so it's lukewarm and we dissolve the yeast and sugar, and we add the olive oil, mixing them. We pour the liquid in the bowl with flour mixed with salt and crushed garlic.


Framantam aluatul pana se desprinde usor de pe degete aproximativ 10 minute. Chiar daca el va fi destul de moale, rezistati tentatiei de a adauga faina. Rasturnam aluatul intr-o tava mare unsa cu ulei.
We knead the dough until it comes out of our fingers around 10 minutes. Though the dough will be pretty soft, resist the tentation of adding more flour. We place the dough in a big oiled pan.


Intindem aluatul cu degetele dupa forma tavii, apasand usor fara a trage de el. Lasam sa creasca pentru 30 de minute pana isi dubleaza volumul.
We flatten the dough with our fingers following the shape of the pan, without pulling it. We let it rise for 30 minutes, until the dough doubles its volume.


Dupa 30 de minute, facem mici gauri in aluat cu degetele (dezumflam aluatul), apasand pana la fundul tavii. Ungem aluatul cu un mix de 3 linguri ulei de masline+3 linguri apa.(se adauga apa, pentru ca gaurile sa ramana albe dupa coacere). Presaram sare de mare deasupra si oregano, sau alte mirodenii dupa plac: rozmarin, cimbru, busuioc, etc.
After 30 minutes, using our fingers we make holes in the dough (flattening the dough), pressing till the bottom of the pan. We grease the dough with a mixture of 3 tablespoons with olive oil + 3 tablespoons with water.(we add water so the holes will remain white after baking). We sprinkle some sea salt on top and oregano or other spices, according to your own taste like rosemary, thyme, basil, etc...     


Lasam aluatul sa creasca inca 30 de minute. Dupa ce a crescut introducem tava in cuptorul preincalzit la 205 grade pentru 25 de minute, cand e frumos rumenita deasupra. O scoatem pe un gratar sa se raceasca.
We let the dough rise for another 30 minutes. After that we place the pan in the preheated oven at 410 degrees for 25 minutes, when it's golden brown on top.  We remove it from the pan and we place it on a rack to cool.


Taiem felii si servim, nu va zic cu ce, ca merge cu orice, chiar si goala! Bon appetit!
We slice and serve, I won't say with what, because it goes with anything, even plain as it is! Enjoy!


Mirosul era atat de frumos incat cu greu m-am rabdat sa o las sa se raceasca :)
The smell was that lovely that I barely waited for the slices to cool :)


Fellile erau frumos crescute si delicioase!
The slices were puffy and delicious!


Mai de aproape.../Closer...  

   
Related Posts Plugin for WordPress, Blogger...