Showing posts with label desert (dessert). Show all posts

Friday, August 3, 2012

Baclava (Baklava)

Share


            Eu credeam ca baclavaua este extrem de complicat de facut si nici intr-un caz nu am indraznit pana acum sa experimentez. Cat de tare m-am putut insela nici acum nu-mi vine se cred :) desi mi se face foarte rar dor de gustul minunatului desert turcesc, trebuie sa recunosc ca baclavaua e una din prajiturile cele mai bune testate de mine! e dulce, aromata din cale afara si partea cea mai buna e ca nu poti manca foarte mult, deci nu te simti vinovat :)) postez reteta acum deoarece pentru mine baclavaua e un desert specific verii, nu ma intrebati de ce :) Pentru prima mea data cand o prepar a iesit grozav de bine zic eu, desi am invatat cate una alta si next time va fi sigur updated!
            I used to think that Baklava is a really sophisticated dessert to make and I didn't dare to explore this one. Oh boy, I can't believe how wrong I was :) though I rarely miss the taste of the wonderful Turkish dessert, I gotta admit that it's one of the best pastries I ever tasted! it's sweet, very flavorful and the best part is you can't eat too much of it, so you don't feel guilty :)) I'm posting the recipe now because Baklava is a summer dessert, don't ask me why though :) For my first time making I think it turned out great, though I learned some things now and it'll be updated by next time!


Ingrediente/Ingredients:                                                                          

Pentru foi/For the layers:
1 pachet de foi de placinta/1 package phyllo pastry
350 g nuca macinata/350 g ground walnuts
2 linguri zahar/2 tablespoons with sugar
1/2 lingurita scortisoara/1/2 teaspoon with cinnamon 
150 g unt/150 g butter

Pentru sirop/For the syrup:
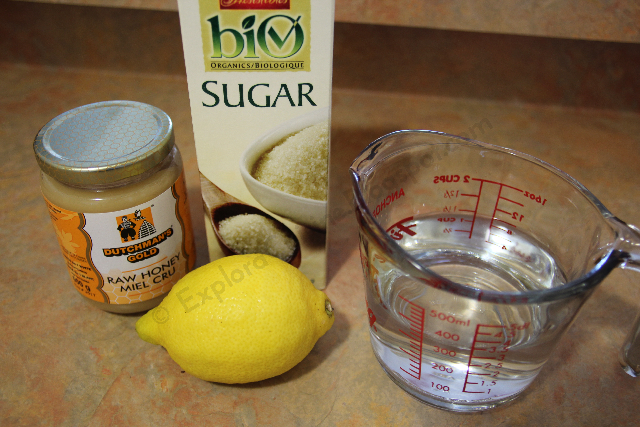
 250 ml apa/250 ml water
 250 g zahar/250 g sugar
 2 linguri miere de albine/2 tablespoons with honey
 sucul de la 1/2 lamaie/juice from 1/2 lemon

Tava cu dimensiuni: 33 cm/22,9 cm/5,08 cm/Pan dimensions: 33cm/22,9 cm/5,08 cm


Cum se face/How it's done:


Mai intai preparam siropul: punem la fiert apa cu zaharul pentru vreo 15 minute cand incepe sa se ingroase usor. Dupa ce luam de pe foc, adaugam sucul de lamaie si mierea, amestecam si lasam sa se raceasca.
We first make the syrup: we boil the water with the sugar for 15 minutes until it begins to thicken a bit.We   remove it from the heat and we add the lemon juice and the honey, we stir and we let it cool.


Apoi, ne ocupam de foi. Totul merge foarte rapid daca le aveti toate la indemana. 
Then we make the layers. Everything goes smoothly if you have all you need handy.

 Desfacem pachetul de foi (decongelate in prealabil) si le punem sub un prosop umed ca sa le putem manevra mai usor. Punem untul topit si nuca amestecata cu zahar si scortisoara la indemana. Aducem tava si o pensula de bucatarie pentru a ne fi mai usor.
We take the phyllo layers out (they have to be thawed) and we place them under a wet towel so we can easily use them. We bring the melted butter and the walnuts mixed with sugar and cinnamon close and also the pan and a pastry brush to make things easier.
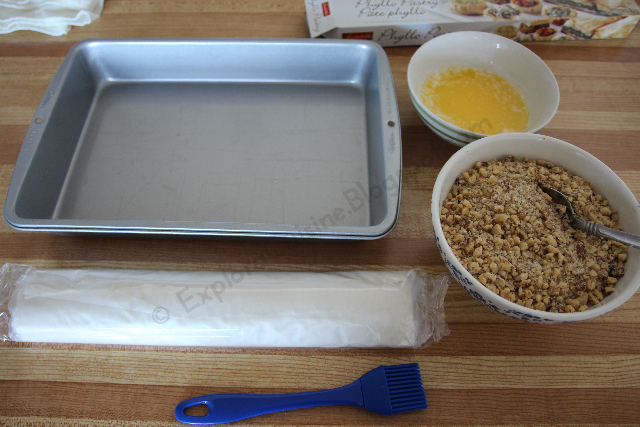

Impartim foile in 4-5 straturi, depinde cate vrem sa facem. Eu am facut 4 straturi, 3 cu cate 5 foi iar ultimul cu 4 foi; citisem undeva ca nu e bine sa fie foarte multe foi la ultimul strat. Sa fiti atenti la cat sunt de mari foile fata de tava, eu le-am lasat asa cu marginile pe langa tava, dar am vazut apoi ca e mai bine sa le tai sa fie la dimensiunea tavii. Foile trebuiesc unse foarte bine cu unt, deci fiti siguri ca aveti destul unt topit.
       Ungem tava cu unt bine si luam prima foaie de placinta, o punem in tava si o ungem cu unt topit bine. De fiecare data acoperim restul de foi cu prosopul umed (vedeti la mine in in stanga in poza)
We divide the sheets in 4-5 batches, depending on how many we want to use. I used 4 batches, 3 of 5 phyllo sheets and the one on top of 4 sheets; I've read somewhere that it's not recommended to use too many phyllo sheets on the top. Be careful to cut the layers according to the pan you'll use, I've left mine too big for the pan and then I've noticed it would've been easier to cut them. All phyllo sheets have to be very well brushed with melted butter so make sure you have enough of it. 
        We grease the pan very well with butter and then we add the first sheet of phyllo, and we brush it very well with butter on top. Every time we take a sheet, we cover the rest with the wet towel (you can see it in the left in my pic)
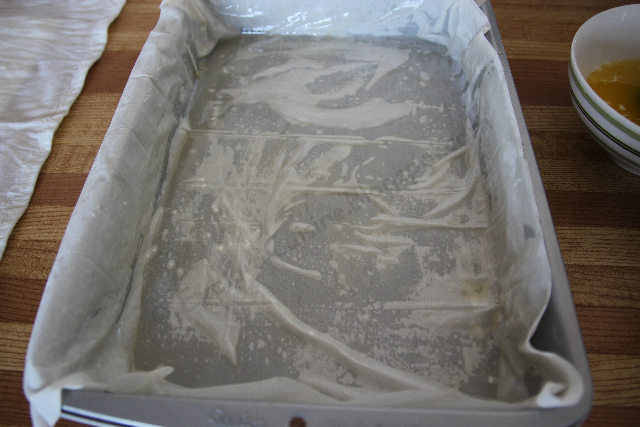

Continuam sa ungem cu unt alte 4 foi, exact la fel. Peste a 5-a foaie adaugam o treime din cantitatea de nuca, presarand uniform.
We continue to brush with butter other 4 sheets exactly the same way. On top of the 5th one we add a third part of the walnuts, spreading it well.
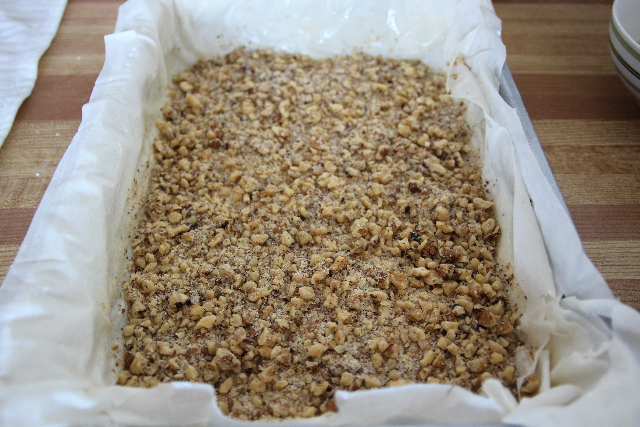

Continuam la fel cu alte 5 foi, iarasi nuca, etc pana terminam cantitatile. Nu uitati sa pensulati cu unt fiecare foaie in parte. Ultimul strat va fi de 4 foi unse. Dupa ce ungem foarte bine ultima foaie, cu un cutit foarte bine ascutit, taiem bucati baclavaua dupa modelul dorit.
We continue with another 5 sheets, again walnuts, etc, until we finish our layers. Don't forget to brush very well with butter each phyllo sheet. The last batch will be of 4 phyllo sheets. After we brush it with butter, using a very sharp knife we cut the baclava by the pattern we like.
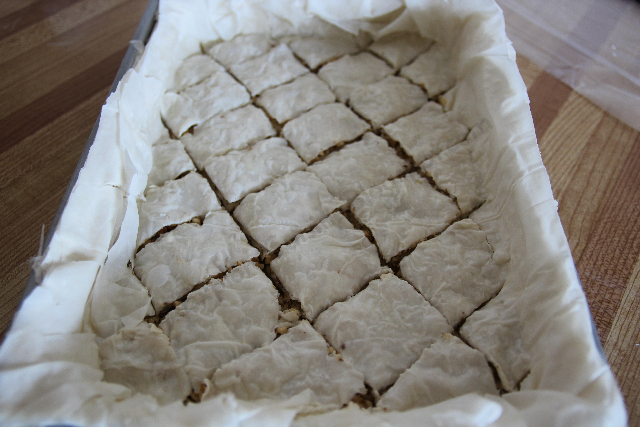

Dam tava la cuptorul preincalzit la 185 grade pentru aproximativ 30 de minute, pana capata o culoare aurie frumoasa.
We place the pan in the preheated oven at 370 degrees for about 30 minutes, until it gets a beautiful golden color.
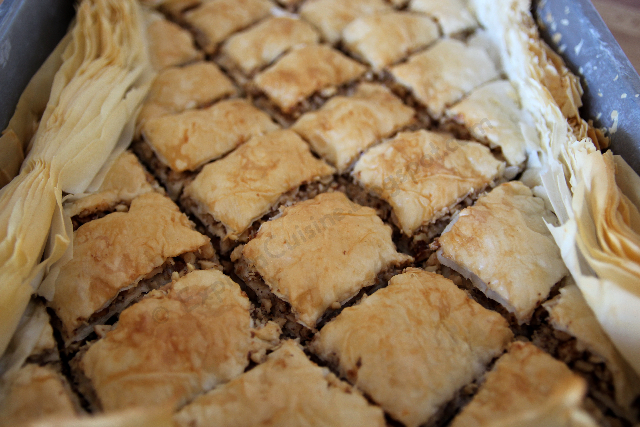

Dupa ce o scoatem din cuptor, punem siropul racit peste baclava. Nu va speriati ca ramane in tava sirop, acesta se va absorbi dupa ce sta baclavaua.
After we take it out from the oven, we pour the cooled syrup on top. Don't be afraid it's too much syrup, the pastry will absorb everything in a couple of hours. 
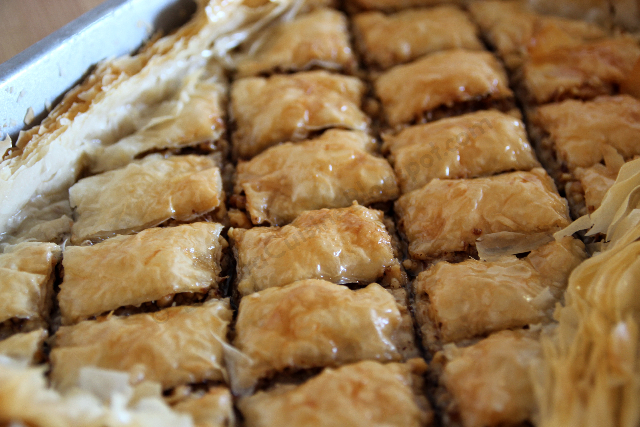

O lasam neacoperita vreo 3-4 ore bune, iar apoi o transferam in frigider, daca mai apuca :) Scoatem cateva bucatele si ne minunam cat poate fi de buna :)
We let it uncovered for 3-4 hours, and then we transfer it in the fridge, if you still have anything to be transferred :) We take out a couple of slices and we enjoy the marvelous taste it has :)
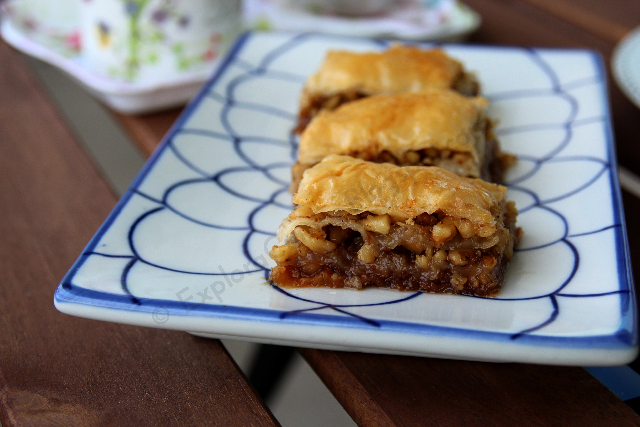

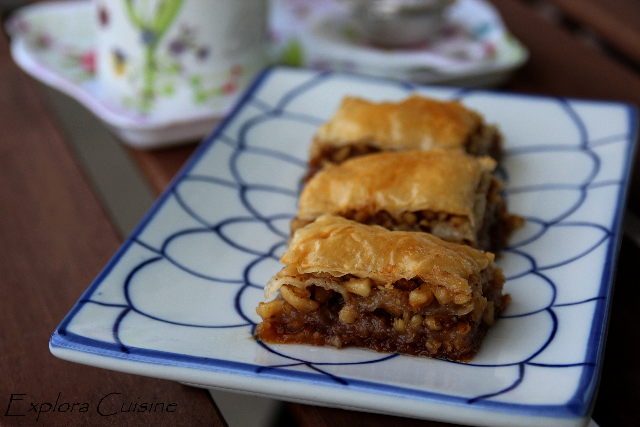
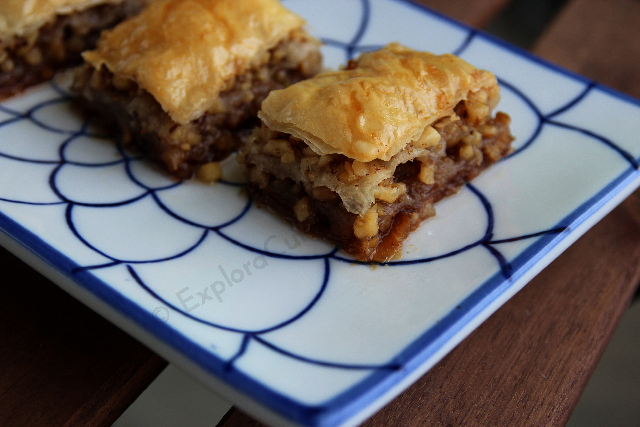
Dupa cum vedeti in poze, prima mea baclava e destul de micuta, data viitoare am sa o fac mai inalta din mai multe straturi. Altfel, mi s-a parut delicioasa, potrivit de dulce si zemoasa exact cat trebuie, ca mie nu-mi place deloc cea uscata rau :) va invit cu drag sa savurati o bucatica lipicioasa si aromata langa o cana de cafea, sau un ceai cum am facut eu! Bon appetit!
As you can see, my first time baklava is a bit short, next time I'm gonna make it taller using more phyllo sheets. Otherwise I found it to be delicious, not too sweet and just as juicy as I like it, I personally don't enjoy the dried out baklava :) I do invite all of you to have a sticky and flavorful piece next to a cup of coffee or a cup of tea, as I had! Bon appetit!


Tuesday, June 19, 2012

Prajitura cu capsuni (Strawberry Cake)

Share


       Weekendul trecut am fost sa culegem capsuni la o ferma inafara orasului, pentru ca a inceput sezonul la cules capsuni in Ontario. Noi iubim mult capsunile si de mult tot planuiam sa vizitam o ferma de asta pick-your-own, dar din diferite motive am tot amanat. Nu pot sa va spun ce grozav a fost!!! lume peste tot, copii fericiti in sorturi si rochite, un miros imbietor de capsune in aer, ce mai, a fost perfect! nu cred ca am vazut vreodata atat de multe capsuni la un loc :)))
       Pentru ca am adunat multe fructe rosii frumoase si sanatoase am ales sa fac dulceata de capsuni anul asta, desi nu fac niciodata asa ceva, si din ce mi-a ramas dupa ce am balotat hihi, am preparat rapid si o prajitura simpla cu capsuni, sa valorificam putin gustul lor minunat!
       Last weekend we went to pick some strawberries outside Toronto since the picking season has started in Ontario. We love strawberries and we thought about visiting a pick-your-own farm for a long time now, but for some reason we always ended up not going. I can't even tell you how great it was!!! people everywhere, happy children in their shorts, a beautiful strawberry smell in the air, it was just perfect! I've never seen so many strawberries in one place in my life :))) 
       Since we picked a lot of healthy and beautiful strawberries I chose to make some strawberry jam this year, though I never make it myself, and with what was left after I ate a lot :), I prepared a simple strawberry cake, to enjoy the beautiful flavor!


Ingrediente/Ingredients:                                                                 
4 oua/4 eggs
150 g zahar praf/150 g powdered sugar
300 g faina/300 g white flour
100 g unt/100 g butter
150 ml lapte/150 ml milk
400 g capsuni/400 g strawberries
1 lingurita praf de copt/1 teaspoon with baking powder
vanilie/vanilla


Cum se face/How it's made:


Am spalat capsunile si le-am taiat in sferturi (mi-era mila sa le tai, atat erau de frumoase) /I washed and cut the strawberries into quarters.(They were so pretty that I almost didn't wanna cut them)


Intr-un bol  mixam untul la temperatura camerei cu zaharul, si adaugam pe rand cate un ou mixand dupa fiecare ou. Apoi punem vanilia, laptele si faina amestecata cu praful de copt. Turnam compozitia intr-o tava tapetata cu unt si faina si punem bucatile de capsuni din loc in loc.
We mix in a bowl the butter with the sugar (butter has to be at room temperature) and we add the eggs one by one, mixing after each one. We then add vanilla, milk and flour with baking powder. We place the mixture in a greased and floured pan and we place the strawberries on top.


Dam tava la cuptorul preincalzit la 185 grade pentru aproximativ 25 minute. Cand e rumenita usor, o scoatem si dupa ce s-a racit putin o pudram cu zahar/We place the pan in the preheated oven at 370 degrees for about 25 minutes. When it's golden brown we take it out and after it cooled a bit, we sprinkle the cake with powdered sugar.


Taiem prajitura felii si servim. Buna si rapida, merge cu orice fel de fructe nu doar capsuni. Pofta buna!!
We slice the cake and serve. Yummy and goes well with any type of fruit really, not only strawberries.
 Bon appetit!


Mai de aproape/Closer:


Thursday, July 28, 2011

Tort cu mousse de piersici, musetel si mure (Peach, Chamomile & Blackberry Mousse Cake)

Share


        Din cauza caldurii maxime ce a cuprins Toronto saptamana trecuta, cand s-au simtit si peste 49 grade Celsius, trebuie sa recunosc ca mi-a scazut de tot dorinta de a trebalui prin bucatarie, de aceea am lipsit putin de pe blog...dar I'm back now si cu ce altceva daca nu cu un tort super fin si aromat de vara ce te face realmente sa visezi! Desi pozele nu mi-au iesit tocmai bine, tortul a fost o minunatie, combinatia de arome este absolut divina!
        Because of the hot weather from last week, when in some days it felt like 49 degrees C, I have to admit that my desire to cook was pretty absent, that's why I didn't post anything for a while now...but I'm back now and what else could I post if not a gorgeous cake recipe, a very elegant and flavorful summer cake that makes you dream! though the pictures aren't really good, this cake was wonderful, the flavor combination is divine!

Ingrediente/Ingredients:

1 blat de tort din 3 oua pt o tava de 23 cm diametru, puteti vedea aici cum se face/1 sponge cake for a 23 cm round cake pan, you can see here how it's made

250 g mure/250 g blackberries
2 piersici/2 peaches
1 lingura flori de musetel/1 tablespoon with chamomile buds
60 ml apa/60 ml water
500 ml frisca lichida/500 ml liquid cream
20 g gelatina/20 g gelatine
80 g zahar/80 g sugar
fructe pt decor/fruits for decoration

Cum se face/How it's made:


Mai intai facem pandispanul din 3 oua. Il lasam sa se raceasca pe un gratar si ne apucam de mousse-uri.
Mousse-ul de piersici si musetel:
Fierbem 60 ml apa cu florile de musetel 2-3 minute.
We first make the sponge cake. We let it cool on a rack and we start making the mousses.
Peach and Chamomile mousse:
We simmer 60 ml water with the chamomile buds for 2-3 minutes.


Strecuram ceaiul obtinut si lasam sa se raceasca.
Curatam piersicile de coaja si le zdrobim cu un mixer vertical pana obtinem un suc gros.
We drain the tea and we let it cool.
We peel the peaches and we blend them with a vertical blender until we obtain a thick juice.


 Adaugam 40 g de zahar si ceaiul de musetel si amestecam. Dizolvam 10 g de gelatina conform instructiunilor de pe pachet si o incorporam in sucul de piersici.
We add 40 g sugar and the chamomile tea to the juice and we stir. We dissolve 10 g of gelatine according to the instructions on the package and we gently add it to the juice.


Mixam 250 ml frisca si cand frisca s-a intarit adaugam si sucul de piersici, amestecand usor cu o lingura. O dam la frigider pt 10 minute sa se intareasca putin.
We whip 250 ml of cream and when it's whipped we add the peach juice, gently stirring with a spoon. We place it in the fridge for 10 minutes so it thickens a little.  


Punem mousse-ul de piersici peste blatul de tort racit in tava in care l-am copt. Punem tava in frigider pana cand facem mousse-ul de mure.
We place the peach mousse on top of the sponge cake. We place it in the fridge until we make the blackberry mousse.


Mousse de mure:
 Zdrobim murele cu un mixer si sucul obtinut cu 40 de g zahar il punem la foc mic pentru 5 minute. Dupa aceea dam prin strecuratoare sosul pentru a indeparta samburii si adaugam cele 10 g de gelatina dizolvata si amestecam usor. Lasam sa se raceasca complet.
Blackberry mousse:
We smash the blackberries with the blender and we place the juice in a small pot on low heat, adding 40 g of sugar and we let it simmer for 5 minutes. After that we drain the juice using a sieve so we remove the seeds and we add the 10 g of gelatine already dissolved. We mix gently and we let it cool completely.


Mixam 250 ml frisca ramasa si cand e tare adaugam sosul de mure amestecand usor cu o lingura.
We whip the cream and when it's whipped we add the blackberry sauce gently mixing with a spoon.


Mousse-ul il punem deasupra in tava peste mousse-ul de piersici si nivelam frumos. Dam la frigider pentru 3-4 ore. Eu am ornat tortul simplu cu mure si piersici.
We pour the mousse on top of the peach mousse and we level it nicely. We place the cake in the fridge for 3-4 hours. I decorated the cake very simple with blackberries and peach.


O felie delicioasa si colorata/ A delicious and colorful slice:


Inca una/ One more


Mai de aproape :)/Closer :) Bon appetit!!!

Saturday, July 9, 2011

Broken Glass Jello

Share

 
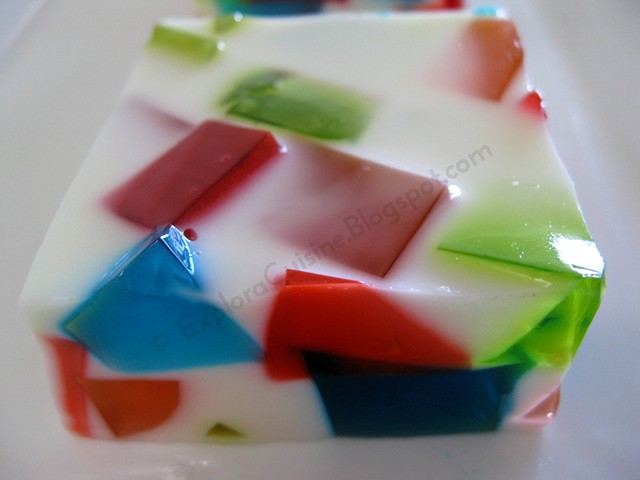
         Nu stiu daca in Romania lumea mananca Jello, dar pe aici e ceva comun fiindca e foarte usor de preparat si racoritor, perfect pentru party-uri vara; cand am vazut prima data reteta aceasta de jeleu cu lapte condensat la justJenn recipes am fost atat de impresionata de cum arata, ca m-a bantuit gandul acela pana am facut si eu :) recunosc ca nu ma omor dupa Jello facut simplu, dar cu lapte condensat parca are cu totul alta aroma! e simplu de preparat si arata deosebit, copiii sunt innebuniti dupa el, plus ca se pot face variatii multiple de culori si arome in functie de ocazie.
  Nu am tradus denumirea din engleza pentru ca nu suna bine nicicum, in engleza vine cioburi de jeleu, deoarece imita cioburile de sticla :)  Sper sa-l incercati si sa-i fermecati pe cei dragi, in special pe cei mici! Cu aceasta reteta participi la YBR organizat de Nancy de la SpicieFoodie!
        I don't know if Romanians eat Jello, but around here it's very common since it's easy to prepare and refreshing, perfect for summer parties; when I first saw this recipe with sweetened condensed milk at justJenn recipes I was so impressed with the design that the thought of making it myself haunted me until I made it :) I do admit that I'm not a huge fan of Jello, but combined with condensed milk, it has a different flavour! it's very easy to prepare it and it looks awesome, children are crazy about it, plus you can make different variations of Broken Jello using different colors and flavors according to the occasion.
  I didn't translate in Romanian "Broken Glass Jello", because it sounds different, the name derives from comparing jello pieces with glass shards :) I hope you'll try this recipe and charm your dear ones, especially your little ones! I'm submitting this recipe to Nancy's YBR!


Ingrediente/Ingredients:   


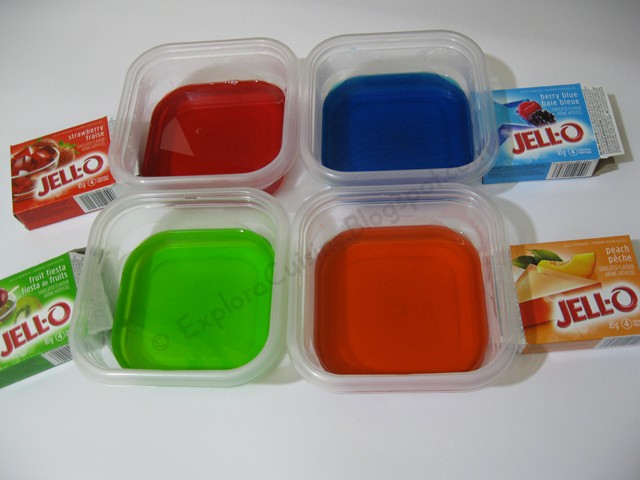
4 pachete de Jello de 85 g de culori diferite:/4 Jello packages of 85 g (3 oz) with different colors:
--capsuni/strawberry
--fruit fiesta/fruit fiesta
--fructe de padure/blue berry
--piersici/peach
1 cutie lapte condensat indulcit (nu lapte evaporat)/1 can of sweetened condensed milk (not evaporated milk)
2 plicuri de gelatina/2 sachets with unflavored gelatine (Knox)
apa/water


Nota/Note: nu am mai pus Jello de struguri, apare din greseala in poza/I didn't use the Grape Jello, it's in the pic by mistake)


Cum se face/How it's made:


Dizolvam praful de Jello separat in cate o cutie de plastic nu foarte mare, (ale mele au vreo 10*10cm) fiecare cu cate 250 ml apa clocotita.
We dissolve the Jello separately, each flavor in one container (small lunch box) with 1 cup of boiling water.


Punem in frigider pentru minim 4 ore (eu am lasat peste noapte). Cand jeleul s-a intarit bine, scoatem din frigider si il taiem cubulete.
We chill the Jello for at least 4 hours (I left it overnight). When Jello has set, we remove it from the fridge and cut it in small blocks each flavor.


Cu grija scoatem jeleul afara din cutii si il asezam intr-o tava de sticla tapetata cu folie alimentara de 22*33 cm, avea a mea, mixand culorile usor (eu am asezat in mai multe randuri din fiecare culoare, ca sa nu-l amestec cu lingura, ca se rupe usor)
Carefully, we remove the Jello from the containers and we place the blocks in a 9*13 glass pan that has saran wrap on it, gently mixing the colored blocks (I placed the blocks in several batches by hand, so I won't tear them apart by using a spoon)


Dizolvam cele 2 pliculete de gelatina in 125 ml apa rece si dupa ce incepe sa se solidifice adaugam 375 ml apa clocotita, amestecam bine si lasam sa se raceasca 10 secunde si adaugam laptele condensat. Amestecam si lasam sa se raceasca de tot. Daca nu se raceste de tot va topi cuburile de Jello!
 Cand s-a racit (fara a se solidifica totusi) turnam in tava peste Jello si usor miscam cu o lingura cuburile, pentru a fi bine distribuite.
We dissolve the gelatin in 1/2 cup cold water and when it starts to bloom we add 1 1/2 cup boiling water, we mix it very well, we let it cool for 10 seconds and we add the condensed milk. We mix very well and we let it cool completely. If it's not completely cooled it will melt the Jello blocks! 
 When the milk mixture has cooled (without being solid) we pout it in the pan on the Jello, mixing gently with a spoon to evenly distribute them.


Punem tava in frigider pentru minim 5 ore.(eu am lasat peste noapte). A doua zi scoatem jeleul cu tot cu folie si taiem cuburi sau diverse forme dupa plac si servim. Voila!
We place the pan in the fridge and we chill for at least 5 hours 9I left it overnight). The second day we remove the Jello with the saran wrap and we cut it in blocks or different shapes and we serve. Voila!


Mai de aproape...Superb colorate, atrag cu siguranta atentia oricui :)
Closer...Beautifully colored, they draw anybody's attention :)


Cu cat amestecati mai bine culorile, cu atat va fi mai frumos colorat in final.
The more you mix the colors, the more colored they'll turn out in the end.


Si inca una...One more...Enjoy!


Tuesday, July 5, 2011

Tarta cu crema de vanilie si fructe (Vanilla Cream Fruit Tart)

Share


         Stiti cum e cu vorba aia, ai grija ce-ti doresti ca s-ar putea sa se indeplineasca? :)) pai da, a venit vara, dar a venit si umezeala odata cu vara si a transformat aerul in irespirabil; toate bune si frumoase, problema e ca mi-a cam luat cheful de a sta in bucatarie si a prepara mancaruri bune, de aceea e cam slaba si activitatea pe blog :) apetitul a scazut si el ce-i drept putin, dar tot mai fac cate ceva bun din cand in cand, mai ales dulce...si daca tot e vara si mananc fructe cu kilogramele, am zis sa fac si eu o tarta cu fructe, ca mi-am cumparat forma de tarta de vreo 2 luni si inca nu am folosit-o :)))
         Prilejul perfect a venit cu provocarea lunii iulie "Dulce Romanie", pe care o gazduieste Flory de la RETETE FEL DE FEL luna aceasta si care a propus ca ingredient si fructele de padure, dupa care eu sunt innebunita, asa ca indata m-am pus pe treaba :) Eu ii multumesc de invitatie la provocare si va rog sa-i faceti o vizita, pentru ca are niste retete minunate, tot una si una! Si acum sa vedem dulcegaria :)
         You know what they say, be careful what you wish for because your wish may come true? :) well yes, summer is definitely here but it also brought humidity and made the air unbreathable; everything's fine, but the problem is that I don't want to stay in the kitchen anymore and prepare delicious meals, that's why the activity on my blog is pretty low lately :) my appetite has decreased also, but I still make yummy things from time to time, especially sweet things...and since lately I'm eating lots of fruits, I wanted to make a fruit tart, since I bought a fruit pan 2 months ago and I never used it :)))
         The perfect occasion came with July's "Sweet Romania" challenge hosted by Flory from Retete fel de fel who chose as an ingredient Berries, which are perfect since I totally love them, I couldn't miss them. I want to thank her for the invitation and I suggest all of you to visit her blog, she has some amazing recipes posted! And now let's see the recipe for the tart :)

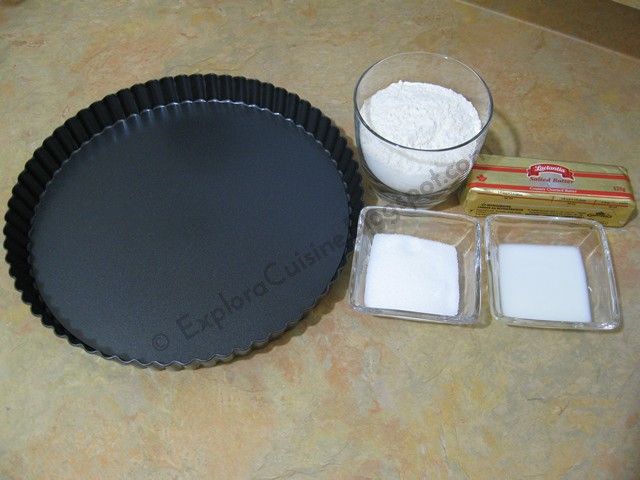
Ingrediente/ Ingredients:

  Pt aluat/For the dough:  Sursa/Source

    125 g faina/125 g all purpose flour
    110 g unt/110 g butter
    1 ou/1 egg
    25 g zahar praf/25 g icing sugar
    1 lingura lapte/1 tablespoon with milk

Forma de tarta cu fund detasabil/ fluted tart pan with removable bottom


Pt crema de vanilie/For the vanilla cream: 

   3 galbenusuri/3 egg yolks
   400 ml lapte/400 ml milk
   25 g faina/25 g all purpose flour
   25 g amidon/25 g corn starch
   70 g zahar/70 g sugar
   vanilie/vanilla

Pt topping/For the topping:


   fructe: afine, zmeura, capsuni/ fruits: blueberry, raspberry, starwberry
 
Cum se face/How it's made:
   
Mai intai facem aluatul: intr-un bol punem faina amestecata cu zaharul, oul , untul rece taiat cubulete si laptele
We first make the dough: in a bowl we add the flour, sugar, cold butter, the egg and the milk.


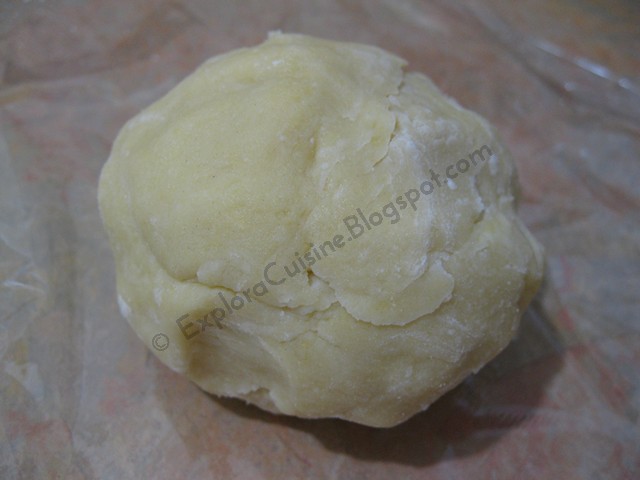
Amestecam cu mana ingredientele pana se aduna laolalta, punem aluatul in folie alimentara si dam la frigider pentru minim 30 de minute, eu l-am lasat 1 ora; cu cat il lasati mai mult cu atat va fi mai fraged.
We combine the ingredients until we form a ball, we place the dough in saran wrap and we place it in the fridge for at least 30 min, I left it for 1 hour; the more it stays in the fridge the tender it will be.


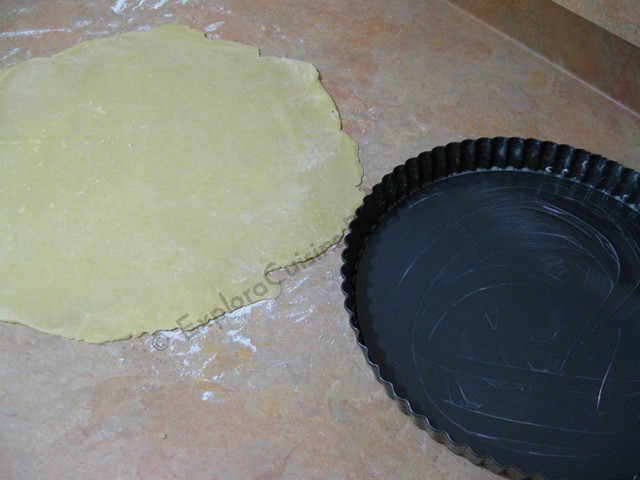
Scoatem aluatul din frigider dupa 1 ora si il intindem in mod egal cu sucitorul pe blatul infainat pana e mai mare ca si forma si ungem forma de tarta cu unt.
We remove the dough from the fridge after 1 hour and we roll it with a rolling pin until it's bigger than the tart pan and we grease the tart pan with butter.


Usor luam aluatul si il potrivim in forma iar cu dosul unei linguri presam usor pe striatii.(daca se rupe pe alocuri, puteti sa completati cu aluat)
We gently take the rolled dough and we place it in the pan and using a wood spoon we make the lines on sides.

                                                                              
Indepartam surplusul de aluat pe margini si intepam aluatul cu furculita pentru a nu se umfla la coacere.
We cut off the remaining dough on sides and using a fork we make holes in the dough, to prevent dough to rise while baking.


Peste tarta punem hartie de copt si bile ceramice, sau fasole, orez, etc, pentru a coace tarta si a o preveni sa se umfle la coacere.
On top of the dough we place a baking paper sheet and ceramic balls (for baking), or beans, rice, etc, to prevent the tart from rising while baking.(blind baking)


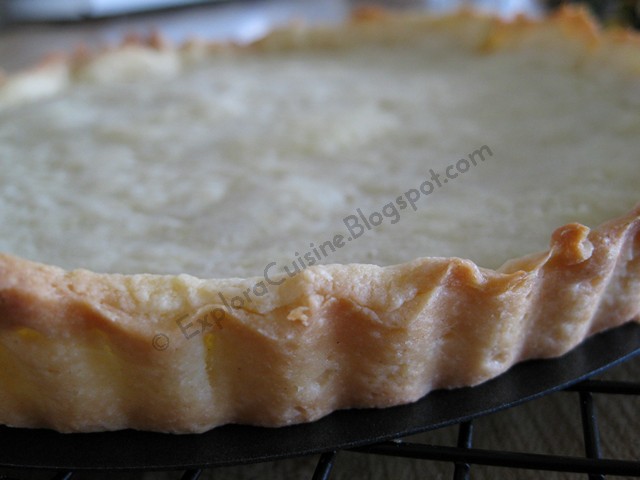
Punem tarta in cuptorul preincalzit la 170 grade pentru 20 de minute, iar dupa acest timp luam hartia si greutatile jos si mai lasam inca aproximativ 5 minute (eu am scazut si temperatura putin); tarta e gata cand devine aurie.
 Cand e coapta, o scoatem pe un gratar impingand fundul de tava in sus usor. Pentru prima data a iesit perfect , aluatul e foarte gustos, nisipos si aromat si nu se rupe deloc; doar sa aveti grija sa rulati aluatul pana sus, ca la coacere el se va lasa putin si inca ceva: mare grija la cum scoateti tarta, eu m-am ars rau la mana cu marginea tavii!!!
We place the pan in the preheated oven at 340 degrees  for 20 minutes, and after 20 min we remove the baking paper and the weights and we place it back in the oven for about another 5 minutes (I reduced the temperature too a little bit); the tart shell is baked when it's golden brown. 
 When the tart is baked, we remove it from the pan by pushing the removable bottom up gently. For my first tart I think it's perfect, the dough is really tasty and doesn't break; pay attention to the dough sides when you place it in the pan, the dough tends to decrease its height a little bit and one more thing: Be very careful how you remove the shell, I got burned really bad with the side of the pan!!!


Pana se raceste aluatul ne ocupam de crema/While the shell cools, we prepare the cream filling.
 Intr-o craticioara punem galbenusurile cu zaharul, vanilia, faina, amidonul si amestecam bine cu telul, adaugand cate putin lapte, pana il punem pe tot.
In a small pot we place the egg yolks with the sugar, vanilla, flour and corn starch and we mix them all using a whisk, adding milk slowly until we add it all. 


Punem craticioara la foc mic si amestecam constant pana obtinem o crema mai groasa, pe care o lasam sa se raceasca bine. Cand crema s-a racit incepem sa asamblam tarta
We place the pot on low heat and we constantly stir until we get a thick cream, which we let it cool off. When the cream has cooled we start to assembly the tart:

Umplem tarta cu crema/We fill the tart shell with the vanilla cream.


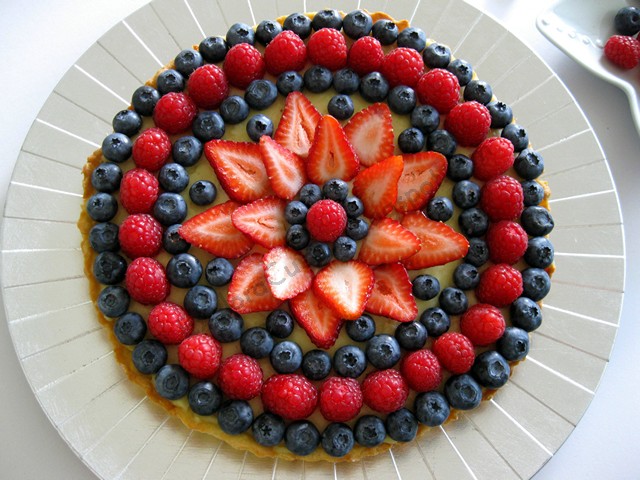
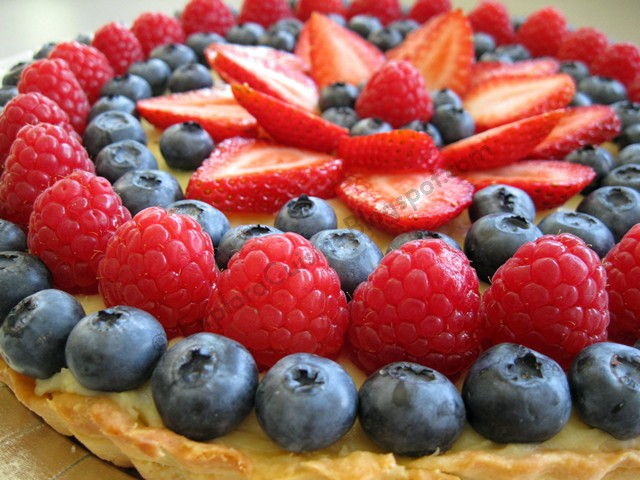
Spalam fructele dorite si le uscam bine cu servete de hartie. Ornam tarta dupa preferinta. Voila!
We wash the fruits and we pat them dry using paper towels. We decorate the tart. Voila!


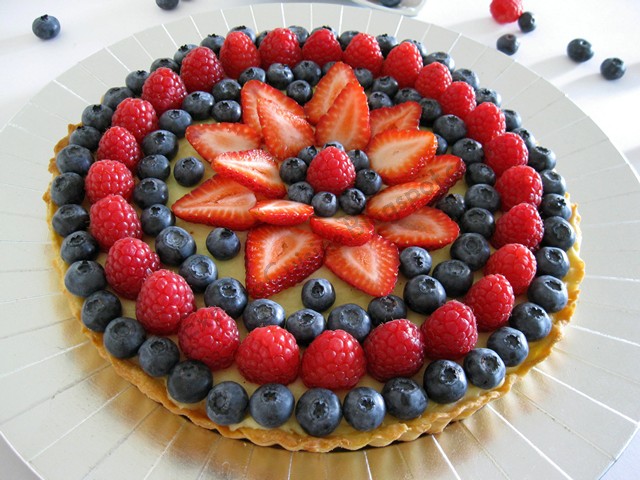
Am obtinut un desert aromat si racoritor, perfect pentru vara!
We got a very flavorful and refreshing dessert, perfect for the summer!


Foarte apetisant si foarte dorit la petreceri de toata lumea!
Appetizing and highly wanted by everyone at parties!


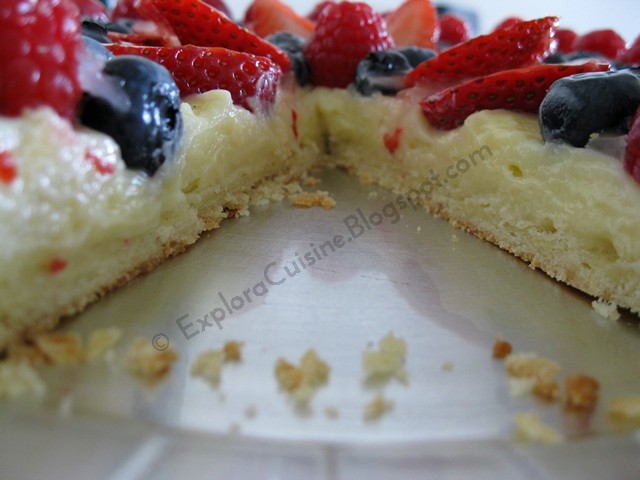
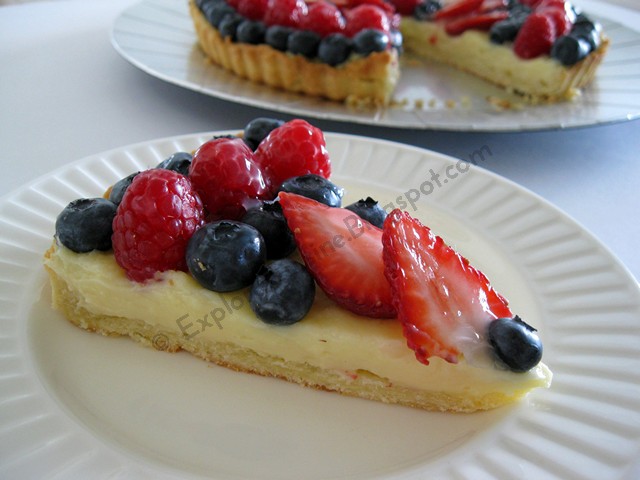
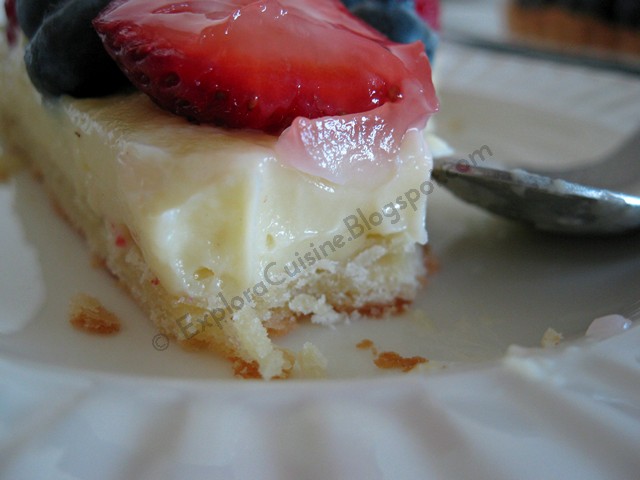
Sectiune...Section...


Felie pentru voi (am pus putin gelee pentru fructe)...A slice for you (I've put a little bit of glaze on the fruits)...


Sa luam o imbucatura, nu? :)  Let's take a bite, right? :)  Bon appetit!!!

Related Posts Plugin for WordPress, Blogger...